

Docker Extensions, the new program announced on 10th of May 2022 at DockerCon, brings a host of new functionalities to the Docker Desktop experience. Portainer.io announced the release of the Portainer extension on Docker Desktop, bringing ease of management and visibility to millions of Docker users. In a step towards a radically simplified and integrated container management ecosystem, the Portainer extension will bridge the gap between Docker Desktop and Kubernetes while offering unparalleled control to developers.
About Portainer
- Portainer is the most popular universal container management platform in the world. Every day, hundreds of thousands of users rely on it to simplify the way they manage software containers.
- It works with Docker, Kubernetes, Swarm and Nomad and is widely used to help users deploy containerized applications, triage issues in secure container environments and build self-service containerized environments.
- It is the most popular Docker management GUI in the world.
Features of Portainer
- Application Deployment :-Portainer Manages the deployment of containerized applications thorugh a manual GUI or simple GitOps.
- Observability & Triage :-It Monitor the performance and behaviour of containerized applications.
- Centralized IAM :-It Control who can do what, when and why inside your environment.
- Platfrom Management :-It Set up and configure your environment - on premise, in the cloud or at the edge.
- The Portainer extension allows Docker Desktop users to spin up and run a version of Portainer CE (Portainer’s free open-source product) natively inside Docker Desktop.
- The result is a richly functional, seamlessly integrated, and intuitive UI for managing local Docker environments.
- As Portainer fully supports Kubernetes, the extension allows Desktop users to deploy images directly into any Kubernetes environment they are connected to with a few clicks and in doing so, radically simplifies the pathway from Docker Desktop to Kubernetes.
Installing The Portainer Extension
The latest version of docker desktop is available with support for extensions. You can install it from here.
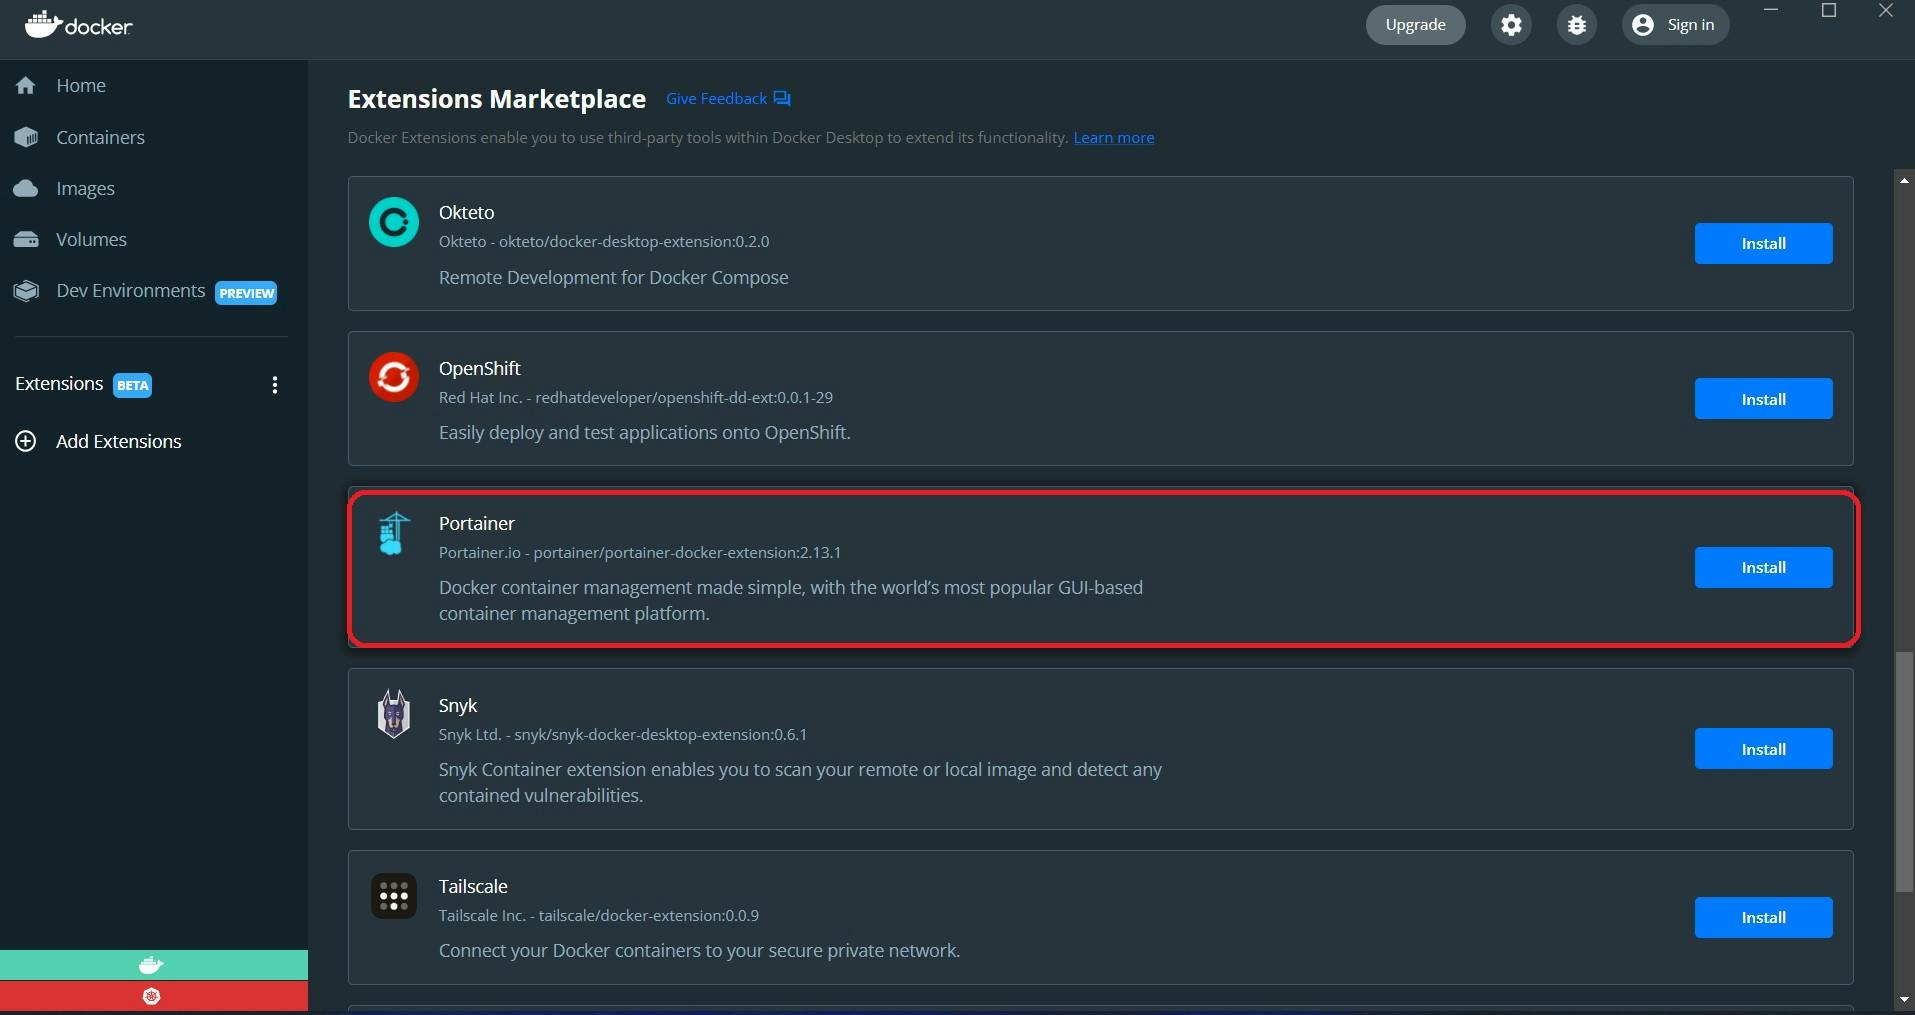
Once you've opened docker desktop, you should see a new extension section in the sidebar and in this we'll click Add Extensions, this will then take us to the Extension marketplace which is the list of all the extensions available for docker desktop. Below, we can see that portainer is listed and this is our new portainer extension, so we'll go ahead and click the install button. Now, docker desktop will go and download the portainer extension for us.
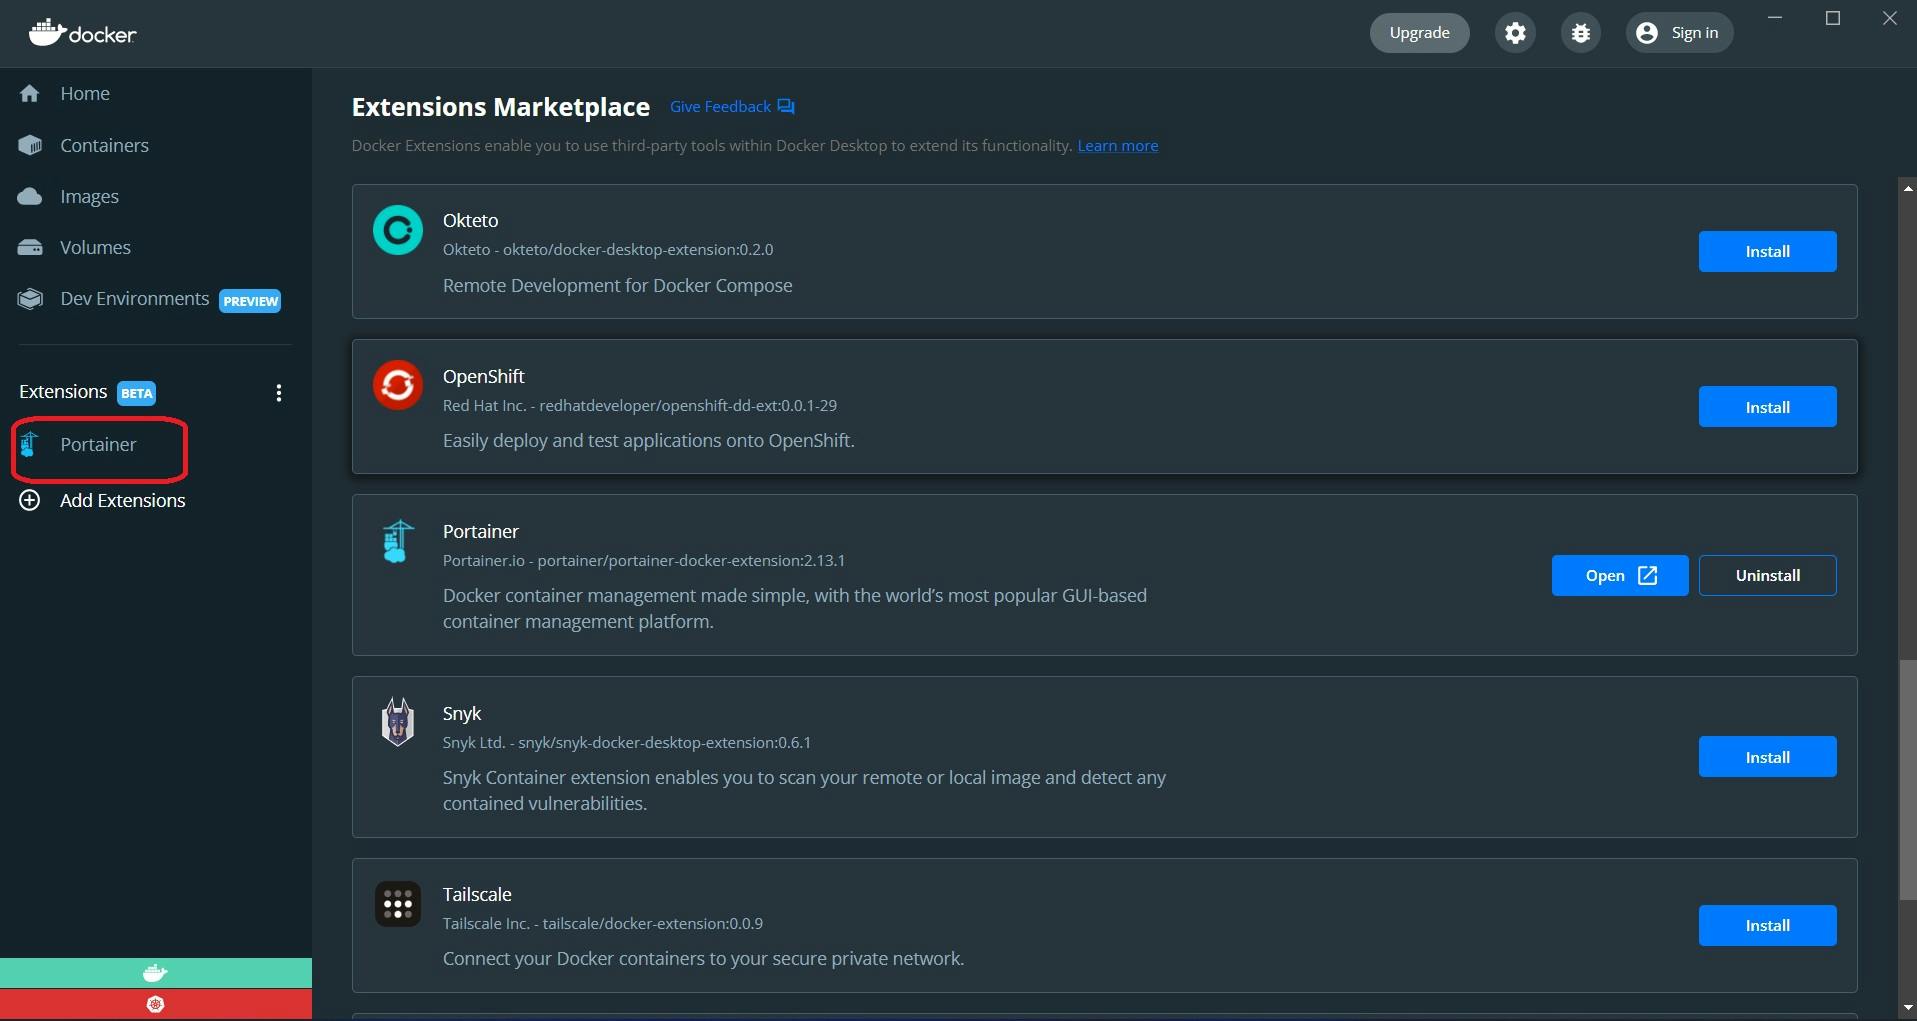
Once it's done, we'll see that portainer is now available to us in the sidebar. Let's go ahead and click it to see what happens.
The successful installation of the portainer will look like this.

What's Different
Now that we have used portainer extension, let's go over what's different.
- Those of you that have used portainer before might immediately notice that there's no username in the top right, nor is there a log-out button.
This is for a very good reason Portainer is running in your docker desktop instance, so there's no need for you to log-in or log-out.
- For this initial version of the extension, we had to remove the HTTPS functionality of portainer owing to how the extension is structured. The front-end is now served by docker desktop, with the back-end run as a container that docker hides by default this disconnect between the front-end and the back-end means that the front-end does not have access to the self-signed certificates that normally would have been generated by the back-end at startup. In a future version of the portainer extension, we'll look at supporting this again and as an added security measure we have restricted the back-end to only be available locally on your machine so that others on your network will not be able to use it.
- Third, is now that portainer is run as an extension that is isolated to just your machine there are no exposed ports this means that the portainer extension can now only manage local environments on your machine or remote agent environments as each functionality needs port 8000 to be exposed so that will not work.
Managing Your Local Docker Environment
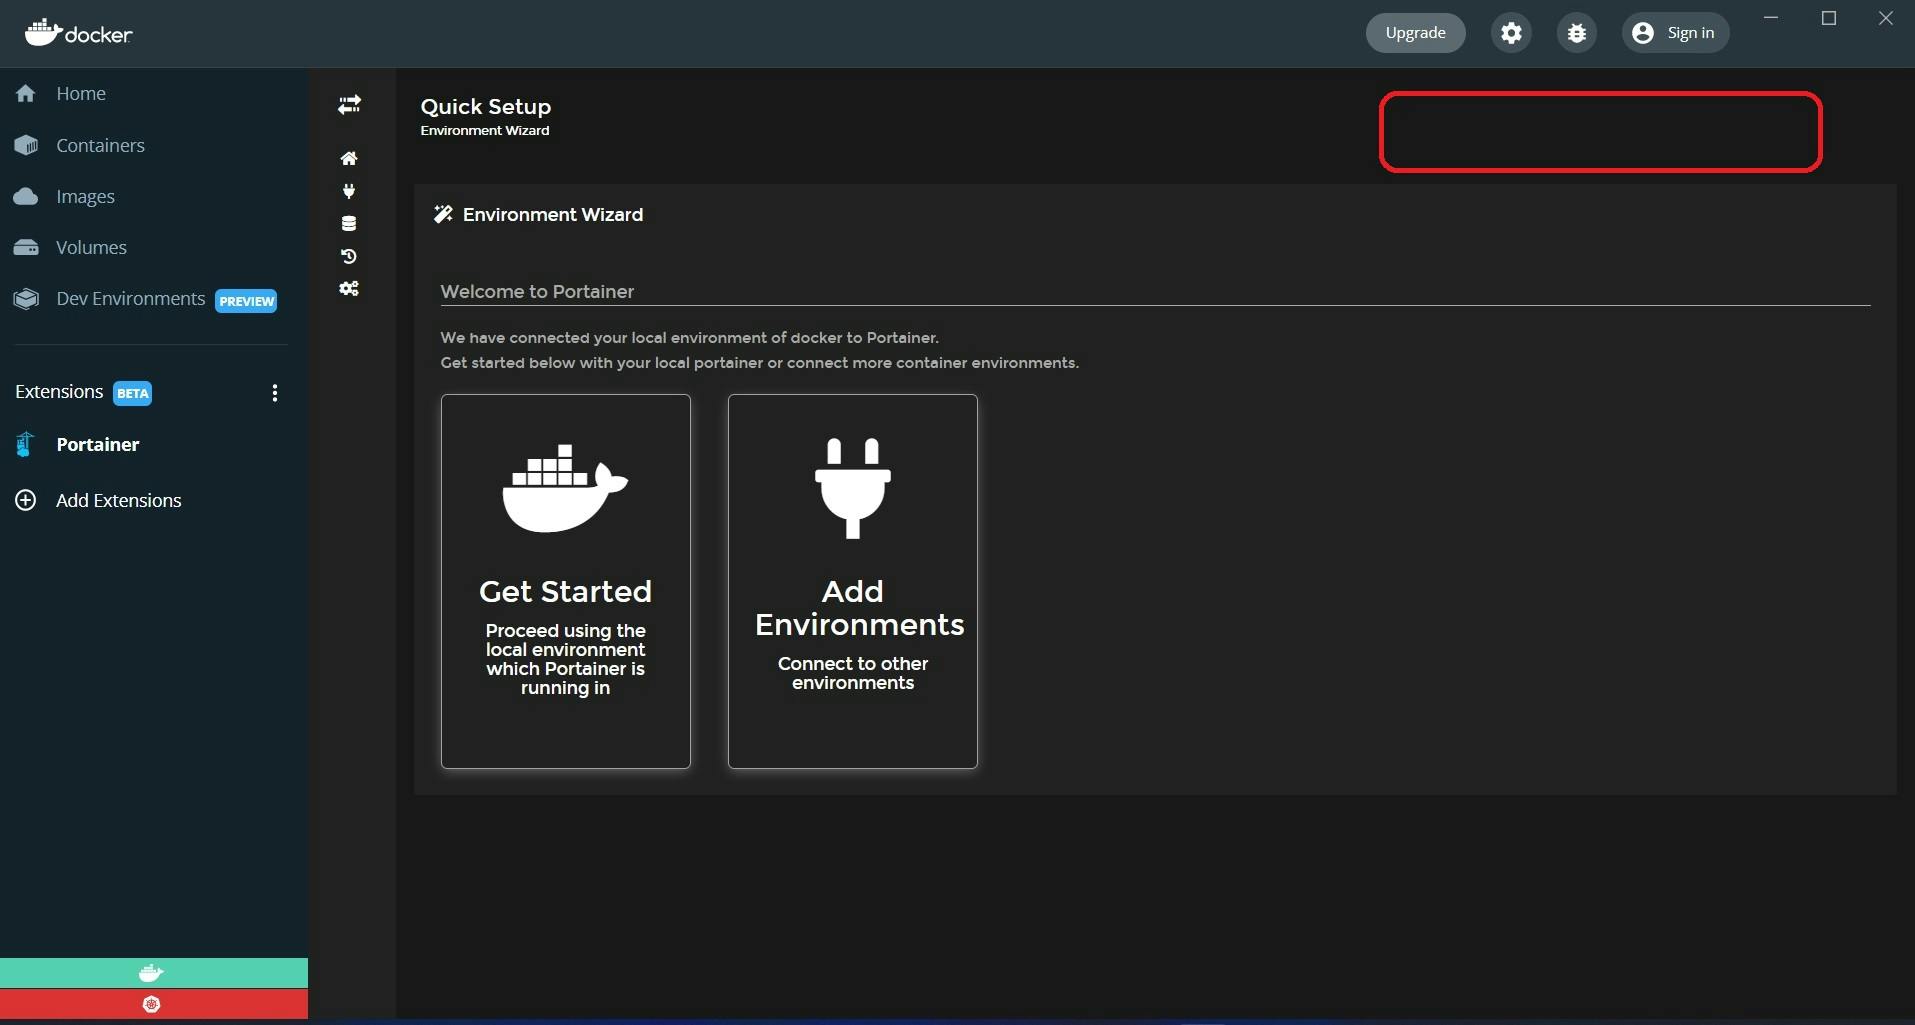
If we look around the portainer extension, we can see our quick setup visit here, which is a relatively new feature we added to easily be able to connect to environments in a fresh instance.
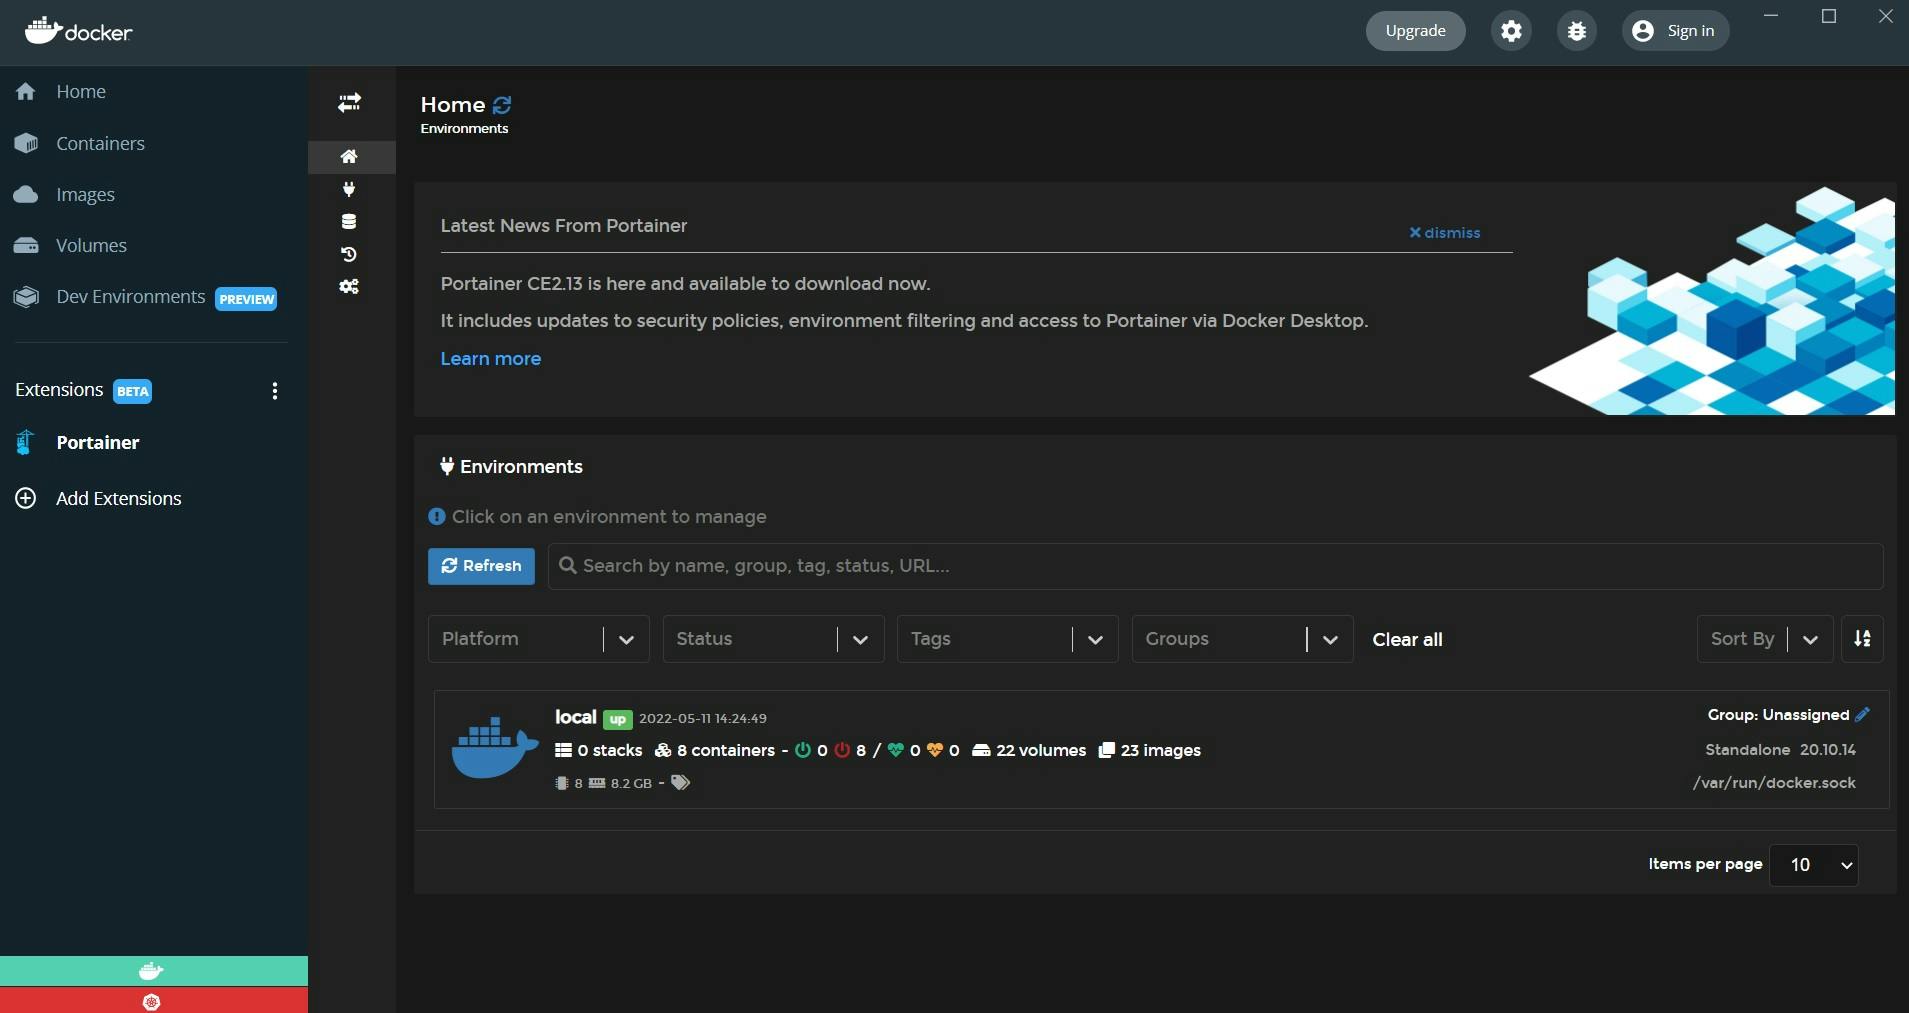
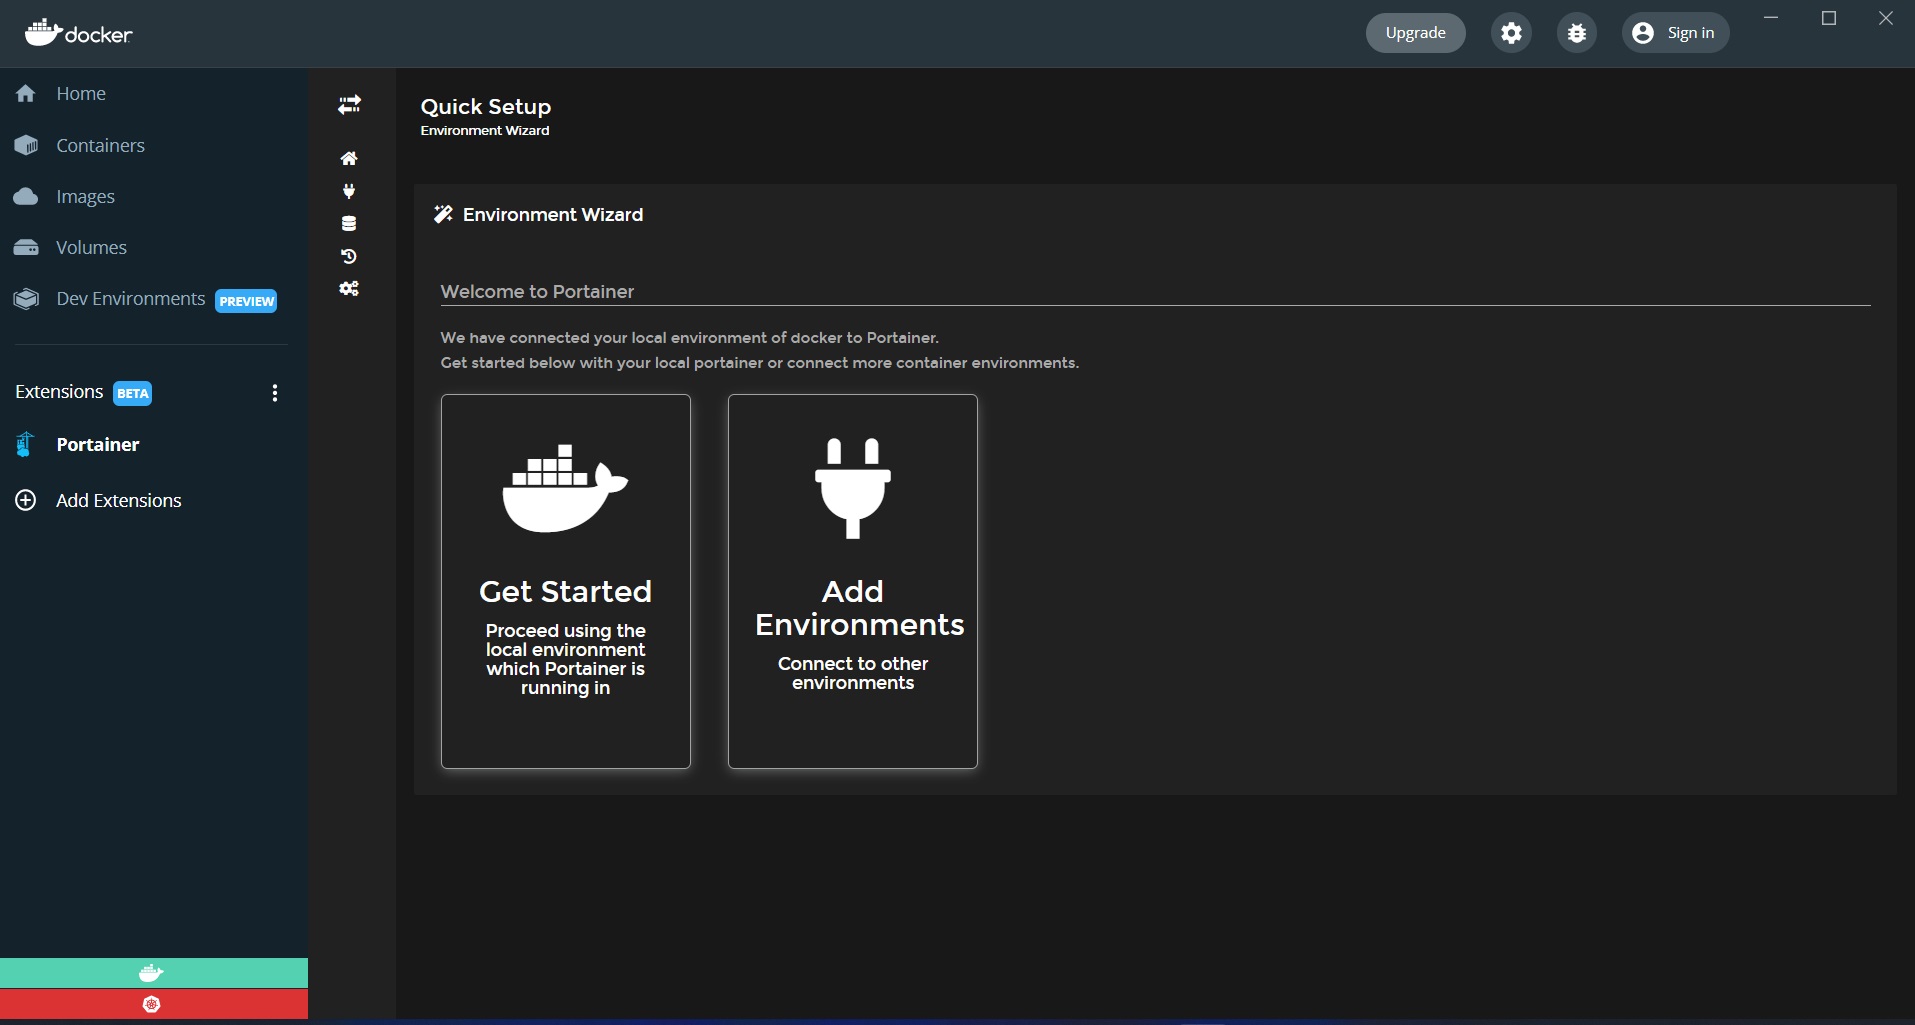 Now we are just going to click on get started, and then we are taken to the home view which lists out all the connected environments the one listed below called the local represents our local docker environment that was automatically added for us by default if we click on this we are taken to the dashboard.
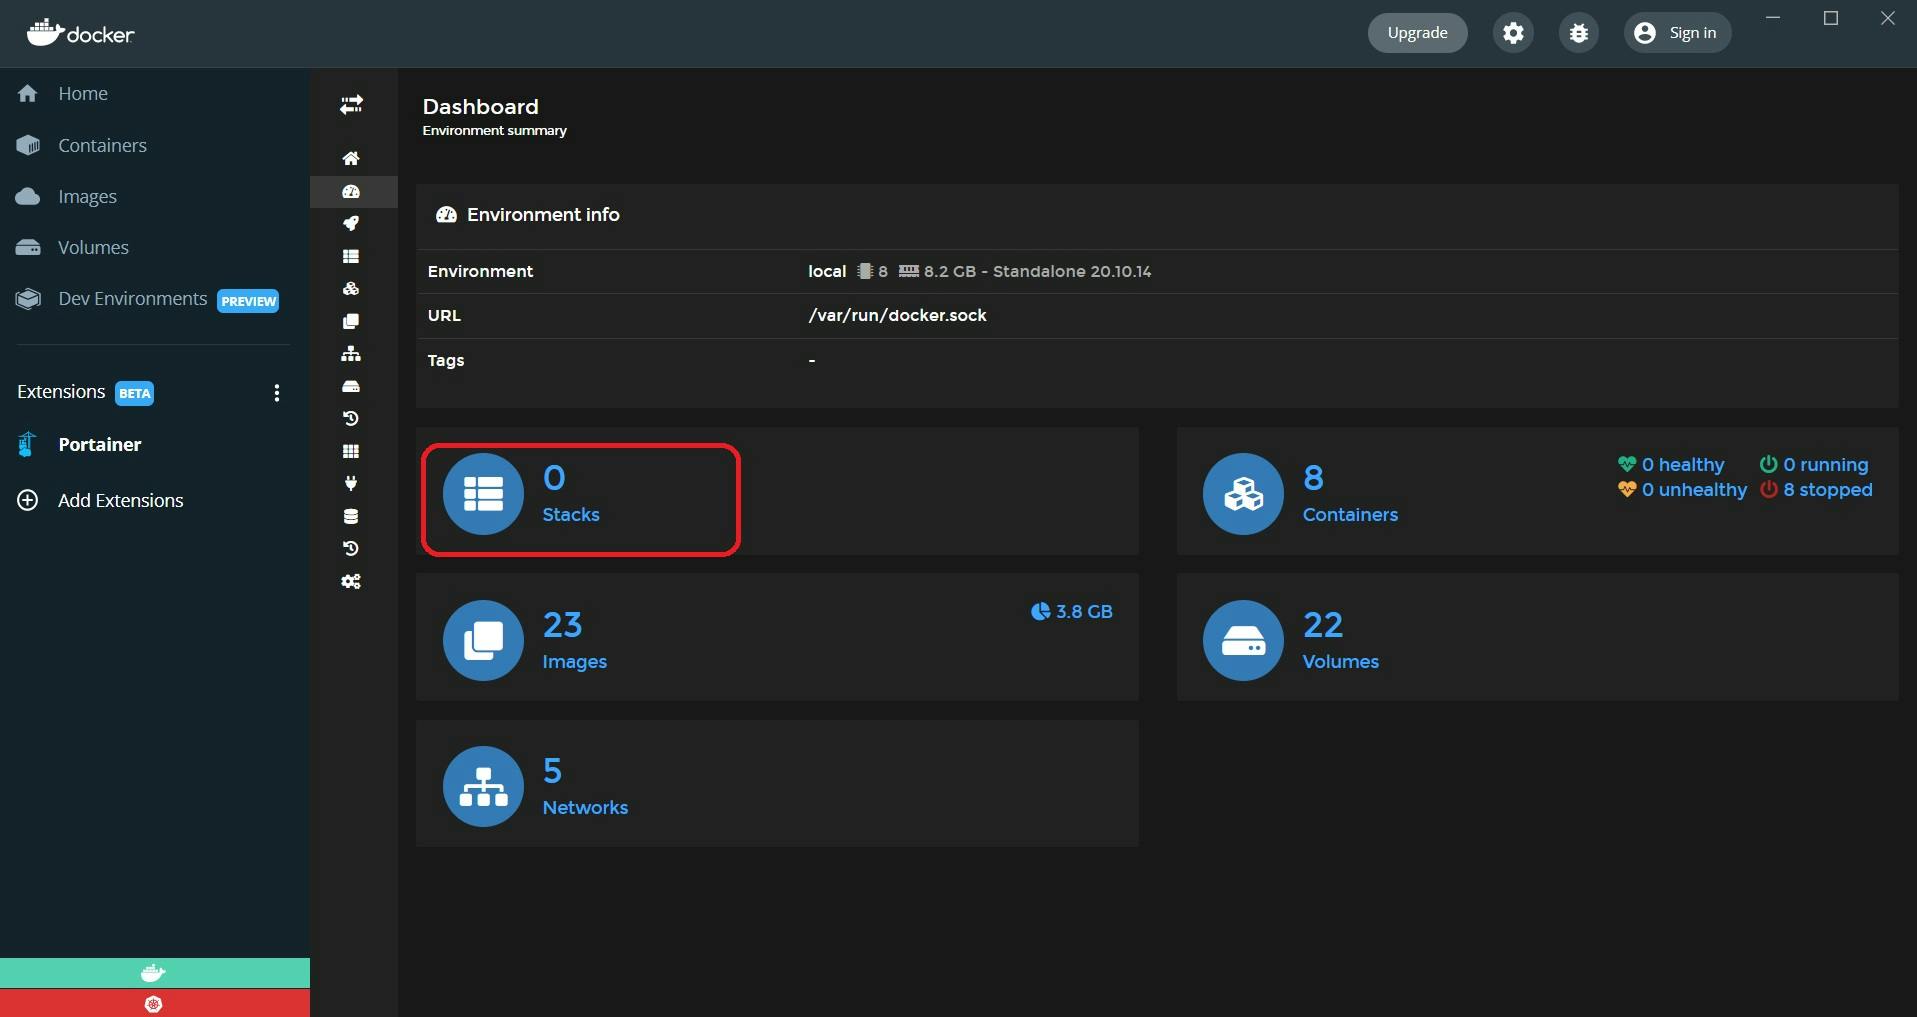
The dashboard shows all the resources that we currently have in our local docker environment.
Let me show you making some changes in my dashboard.
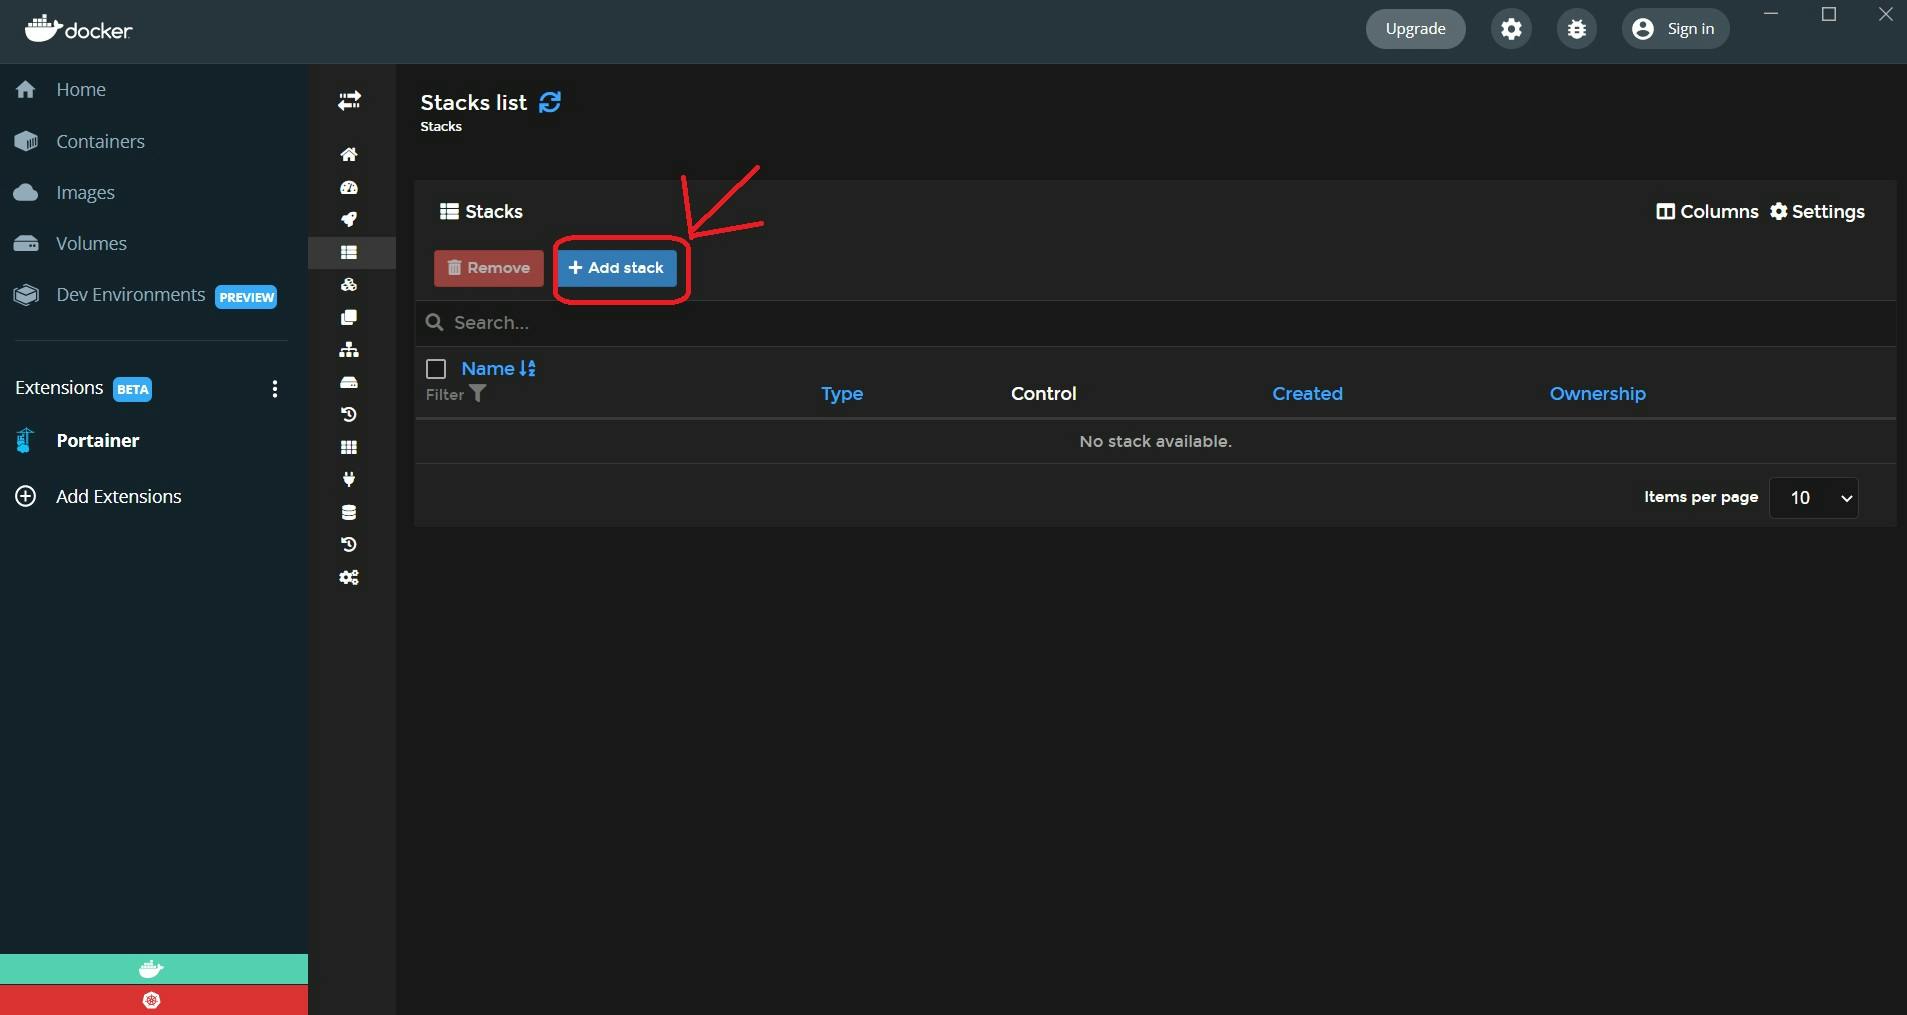
I want to deploy a stack, so I will click on the stacks item, which helpfully takes me to the stacks view, and now I will just deploy a stack the normal way you previously would not for container.
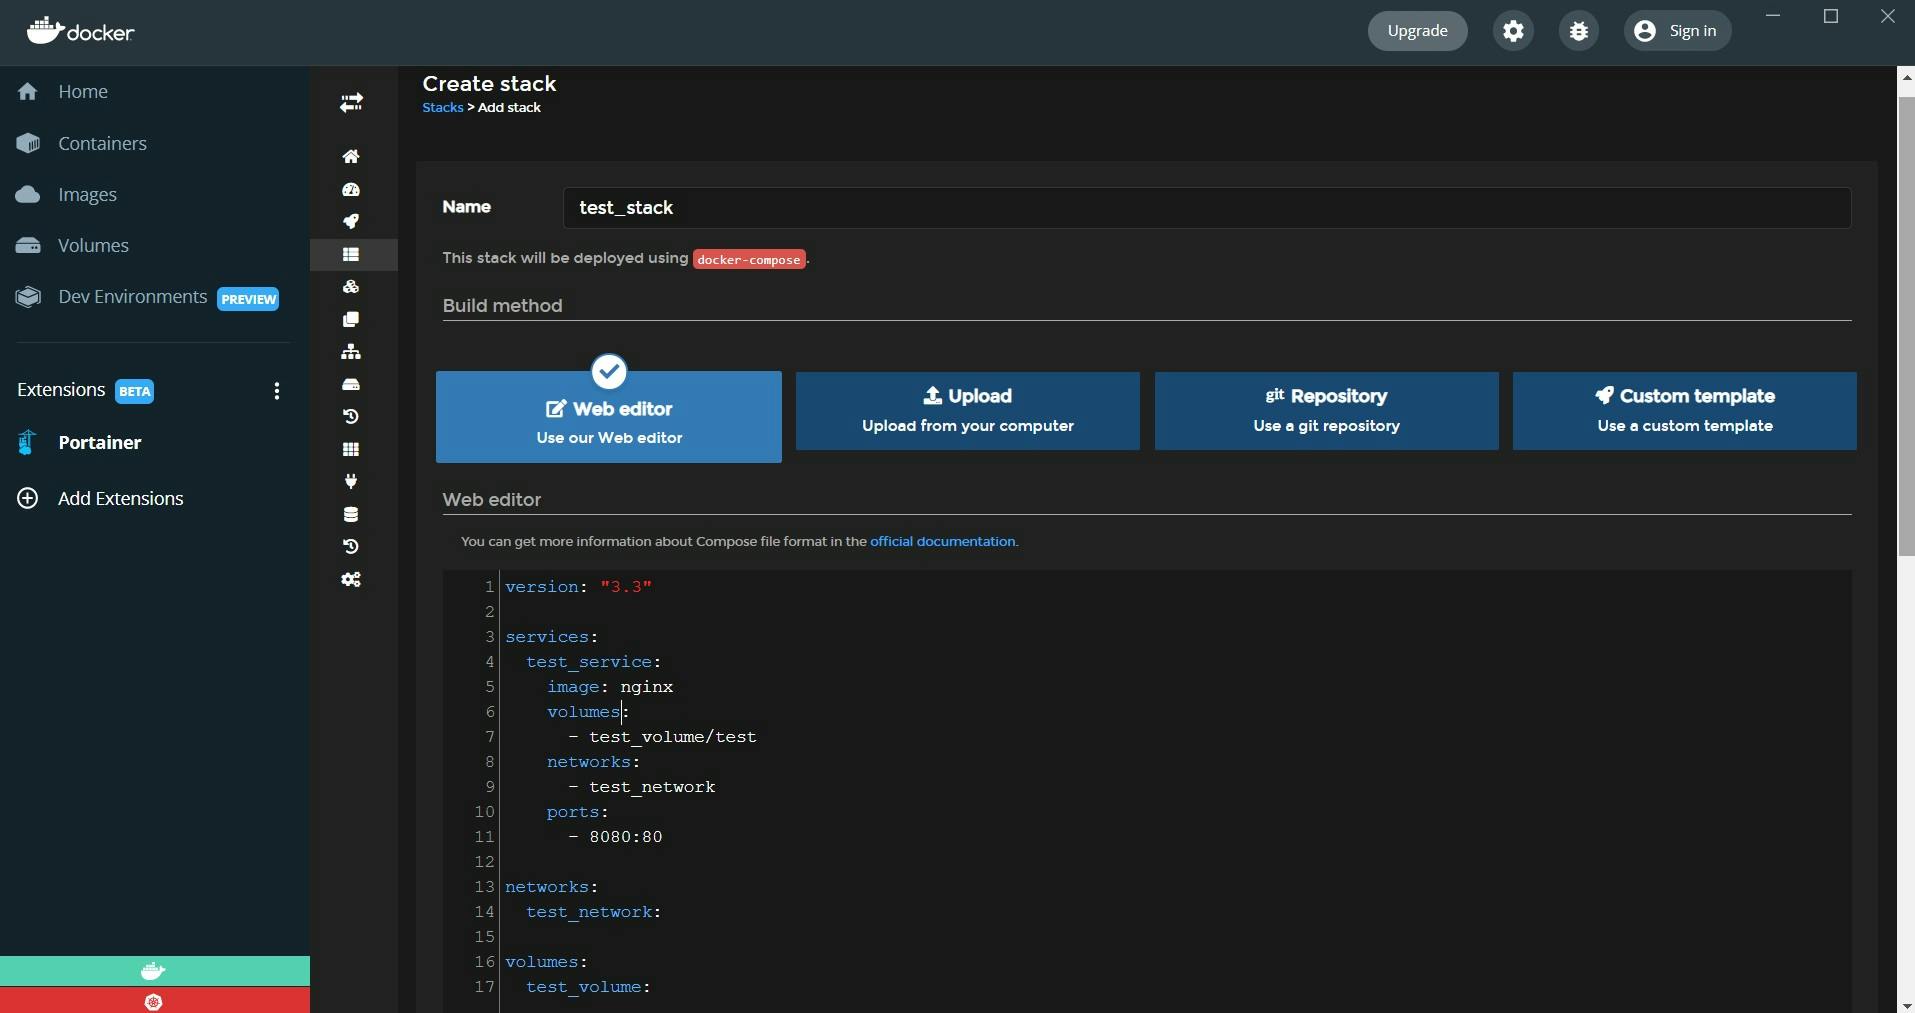
 I will click on the Add stack button.
I will give it a name (Ex : test_stack), and then I will paste in a sample stack that I have put together for this demo and finally let's click on the deploy button.
Sample stack :
version "3.3"

services:
  test_service:
    image: nginx
    volumes:
      - test_volume/test
    networks:
      - test_network
    ports:
      - 8080:80

networks:
  test_network:

volumes:
  test_volume:
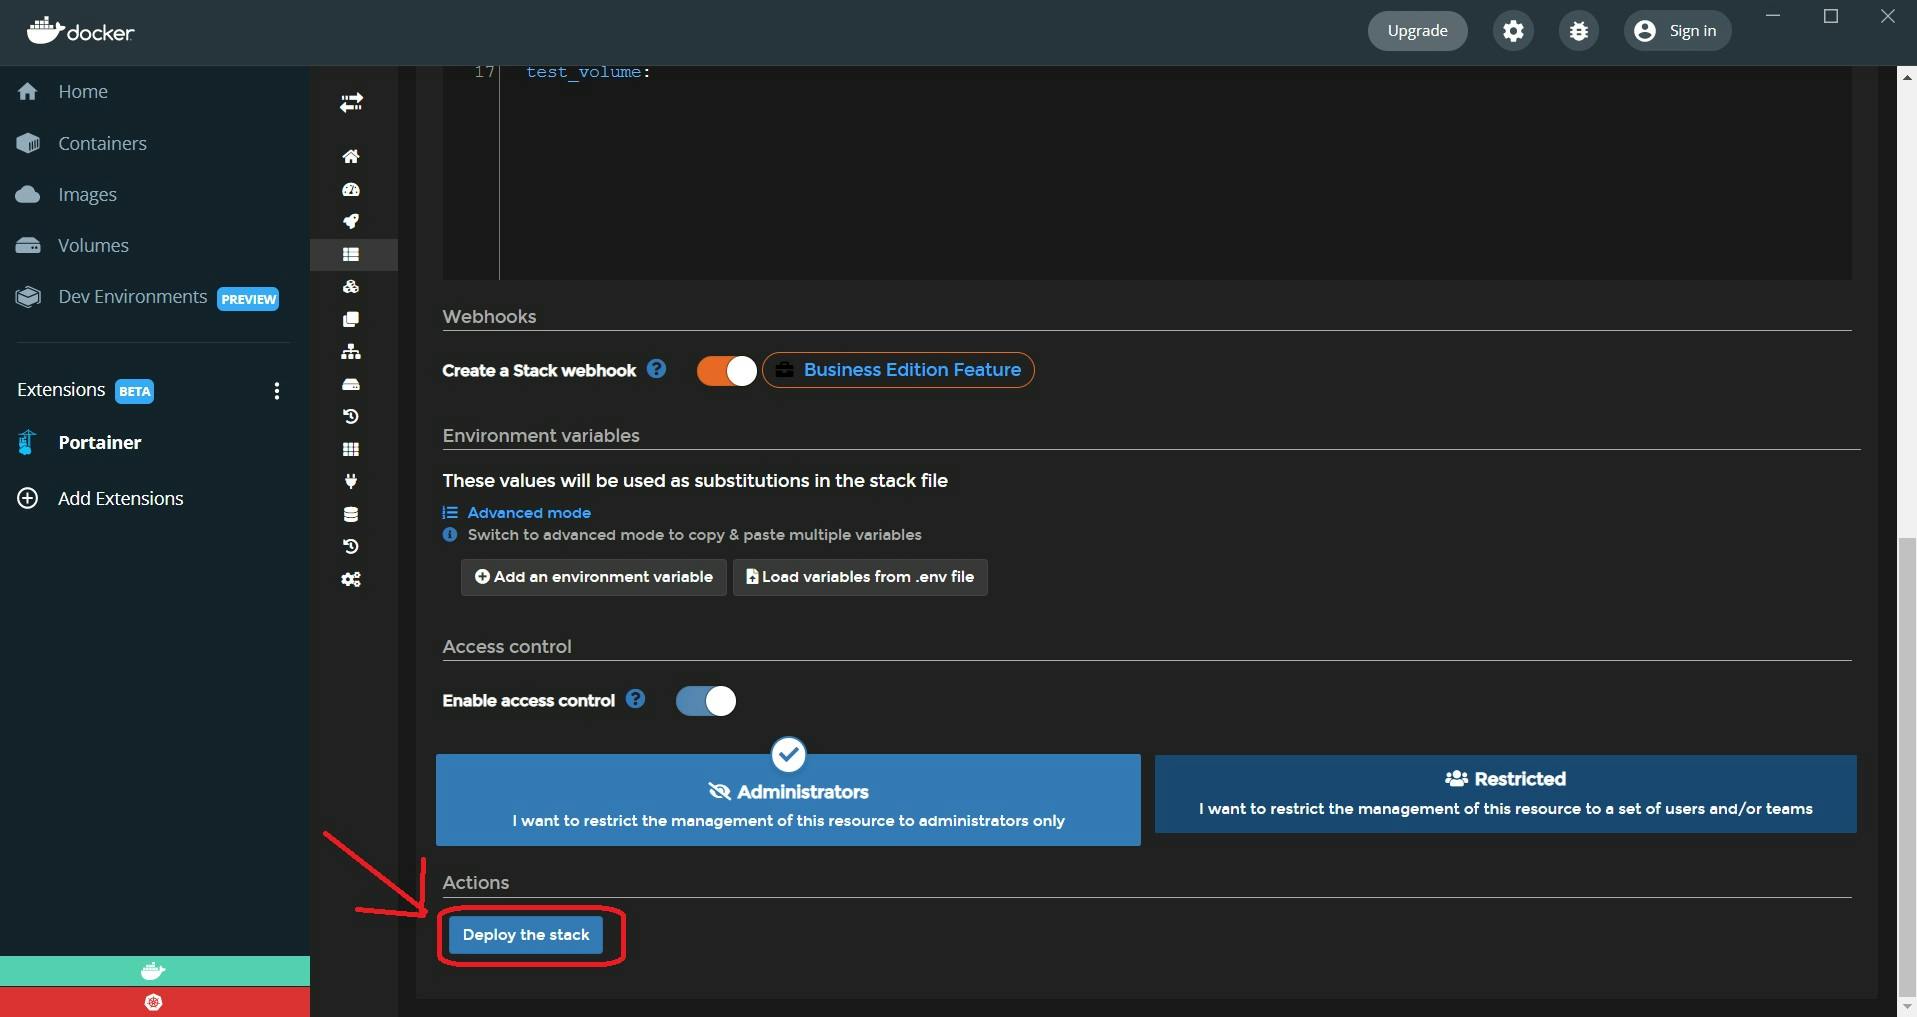
Now, that the stack is successfully deployed, let's check out everything that was created by our stack.
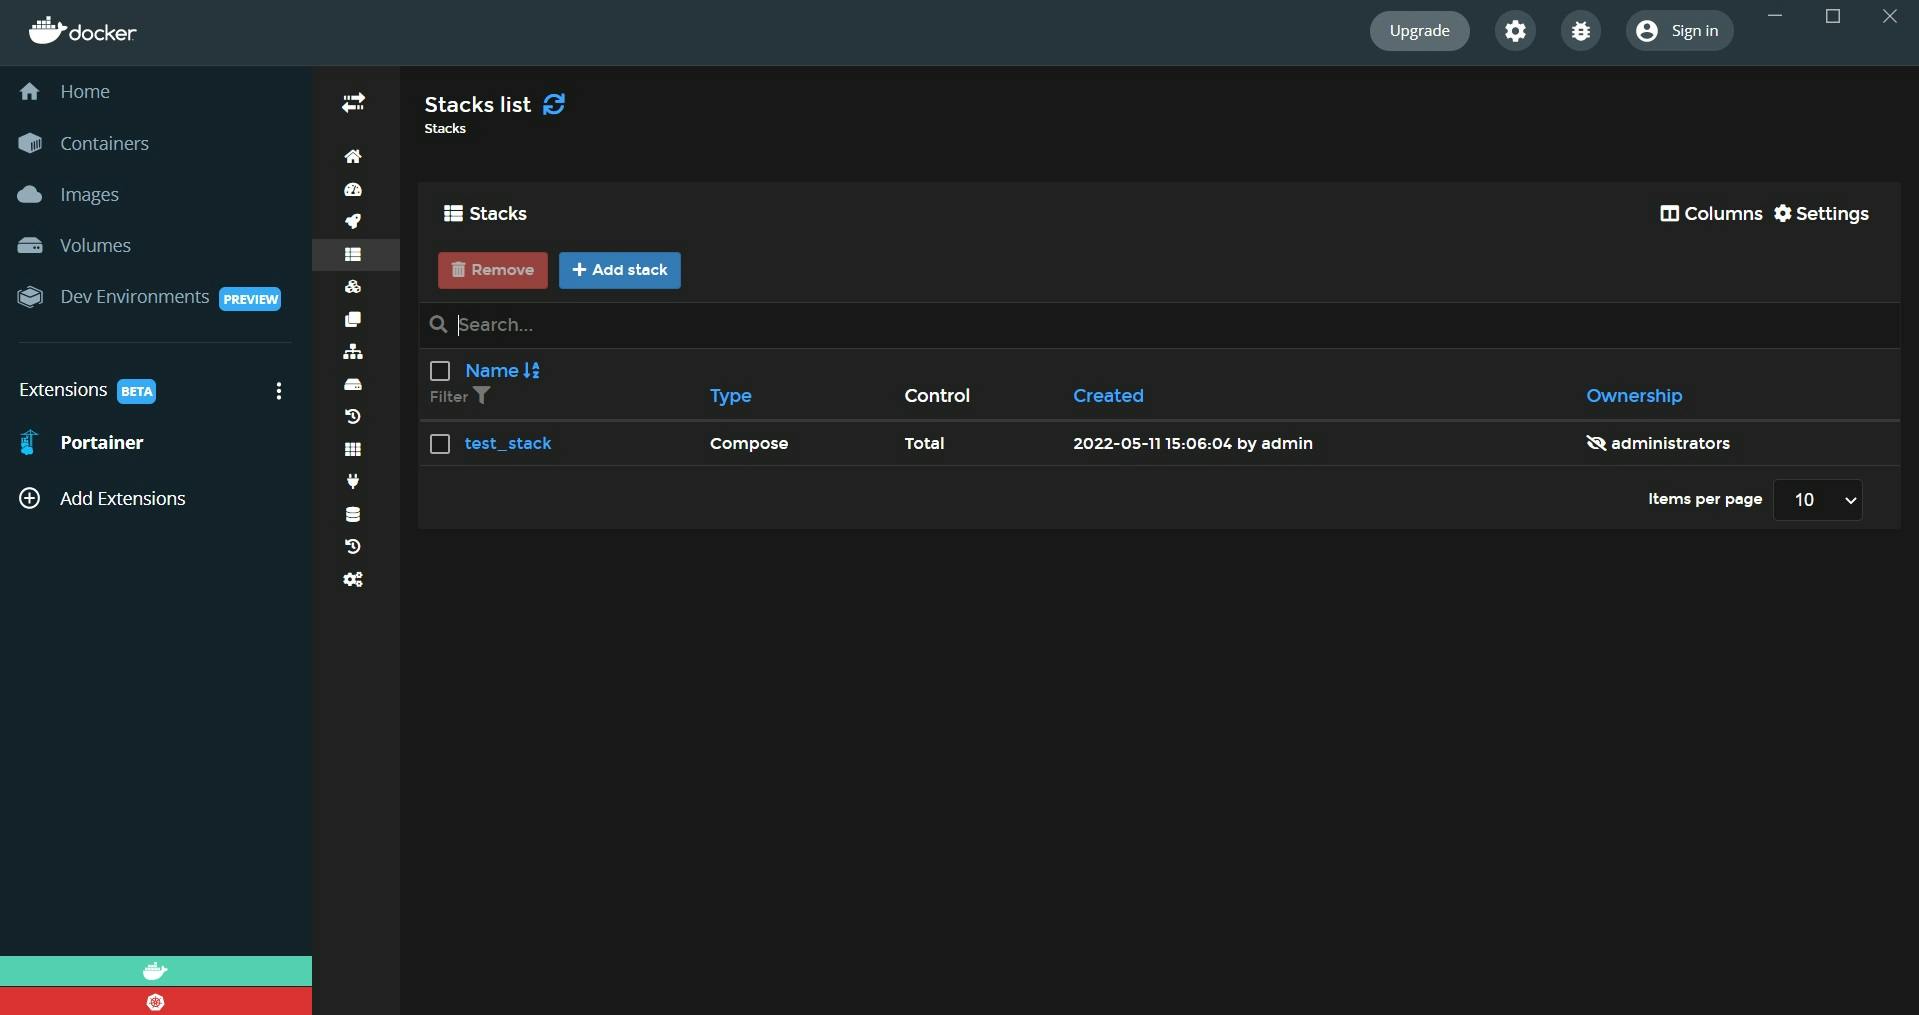
If we click on our stack, we can see listed below the container that was defined.
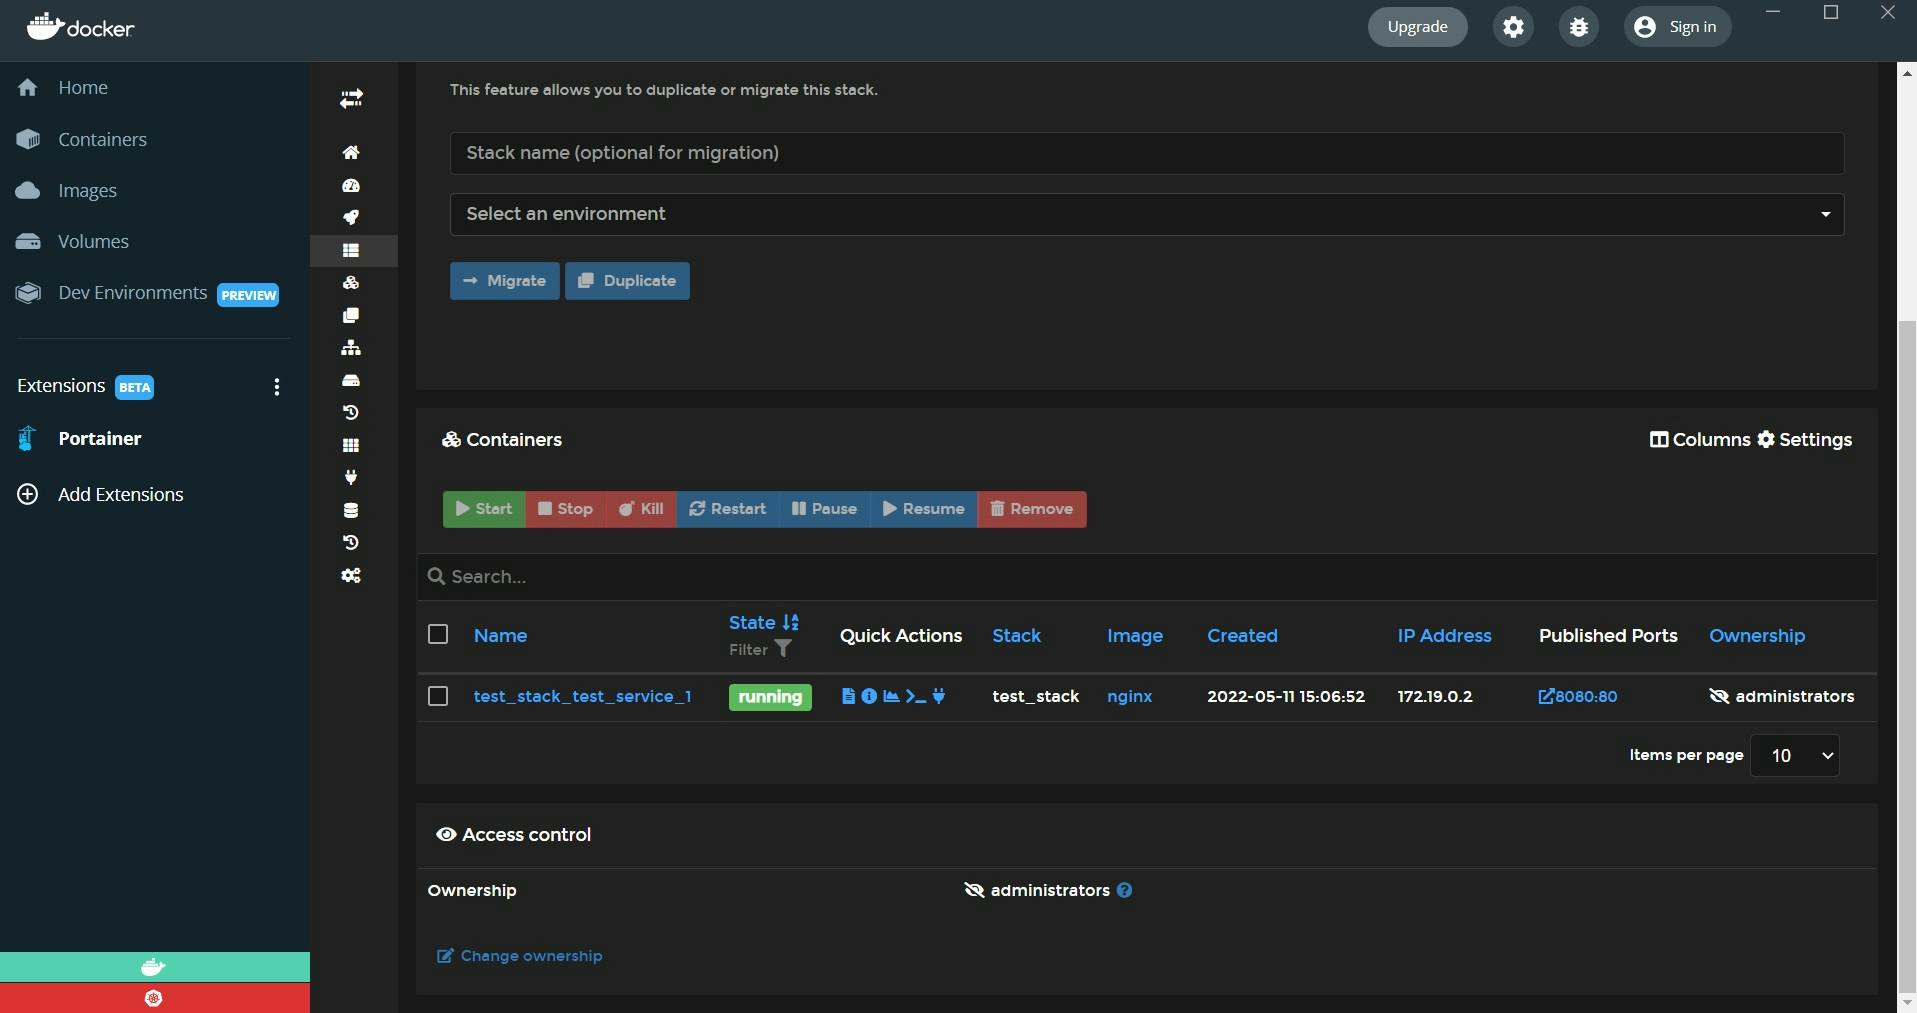
Clicking on our container, we are taken to the container details view, where we can see all the information about our container that we want to find out.
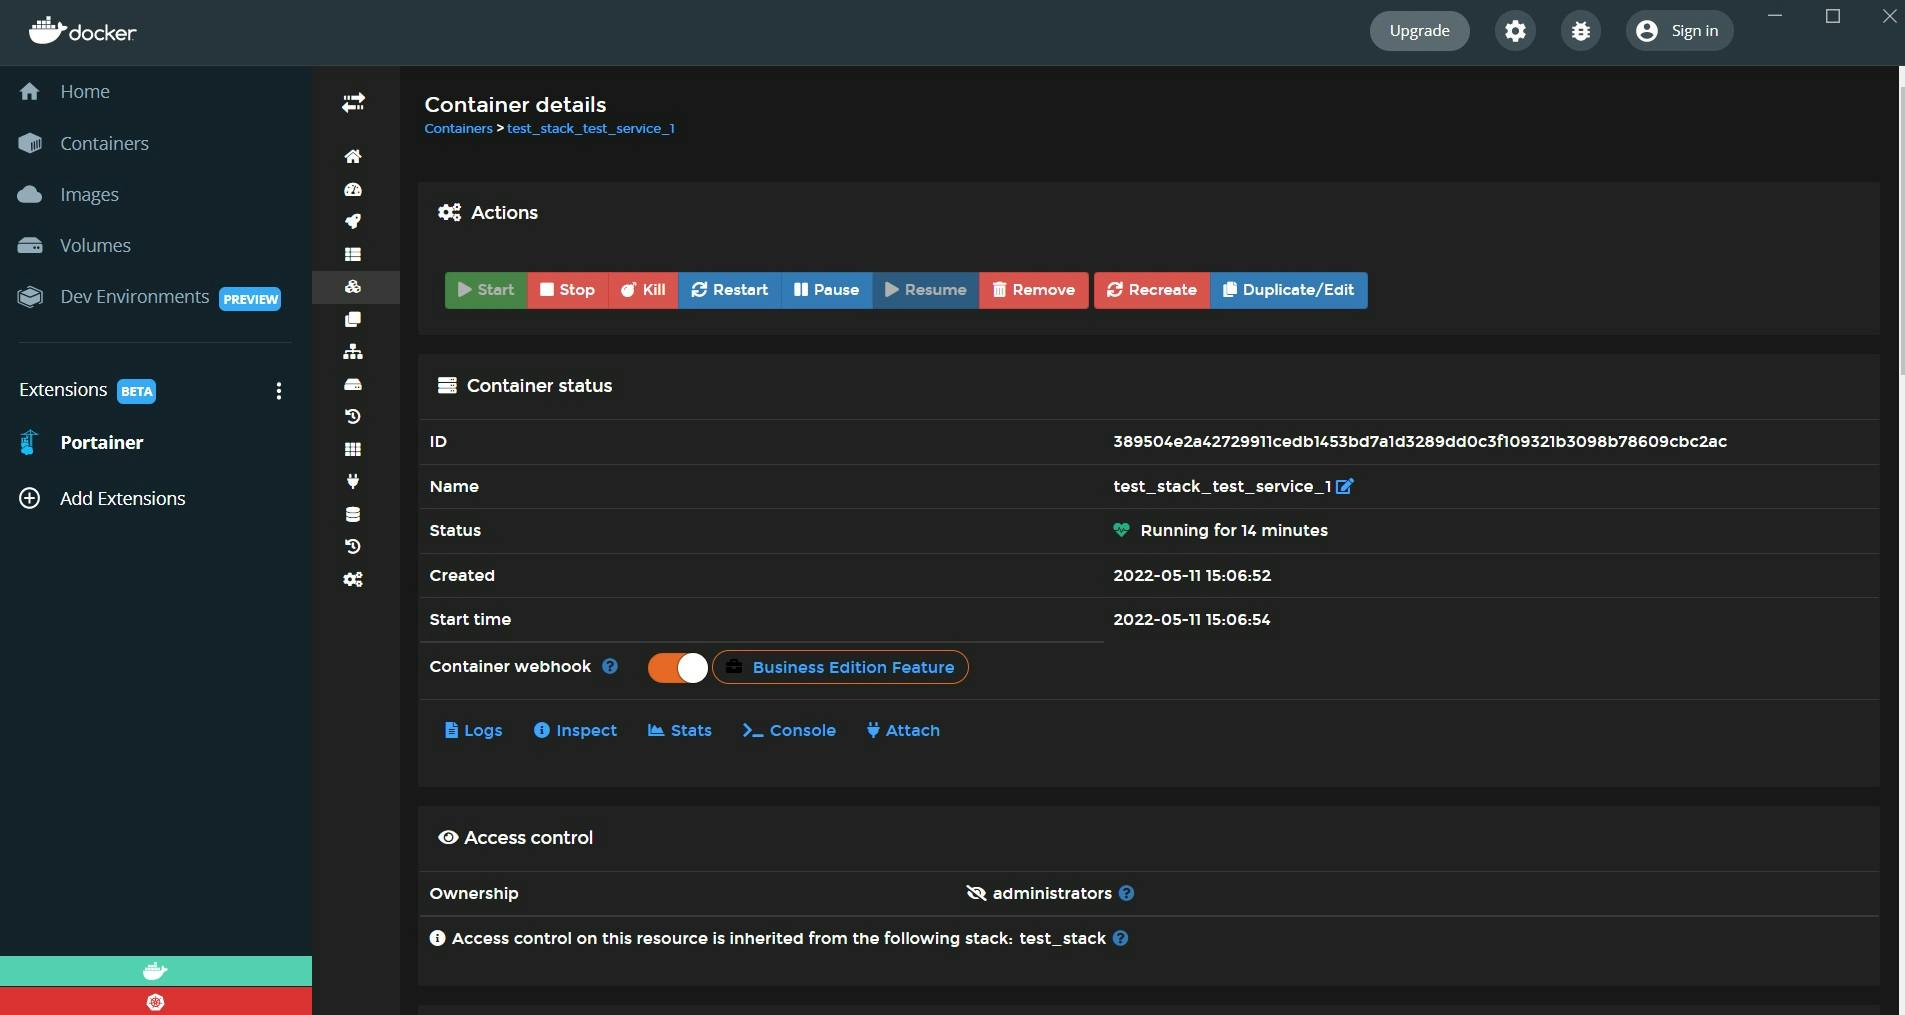 Down the bottom, we have the network that was created by our stack definition and the volume, and they are both linked to this container.
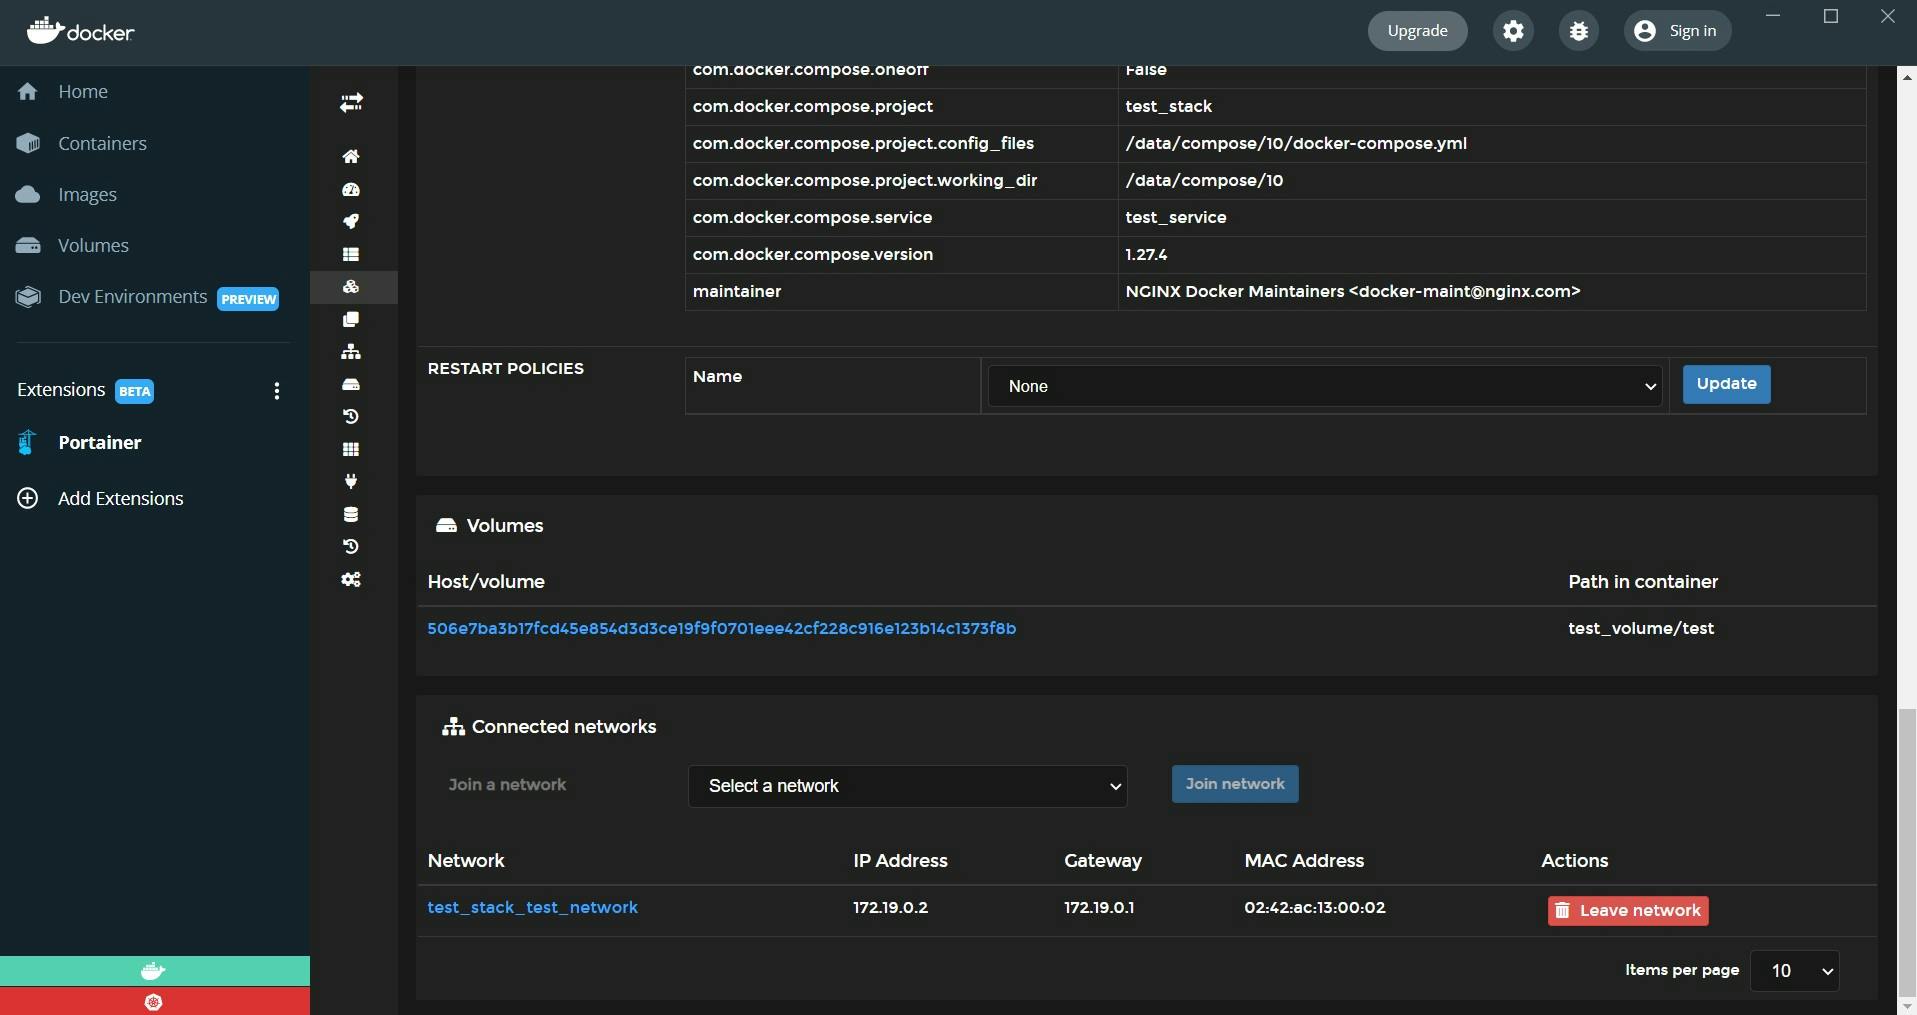
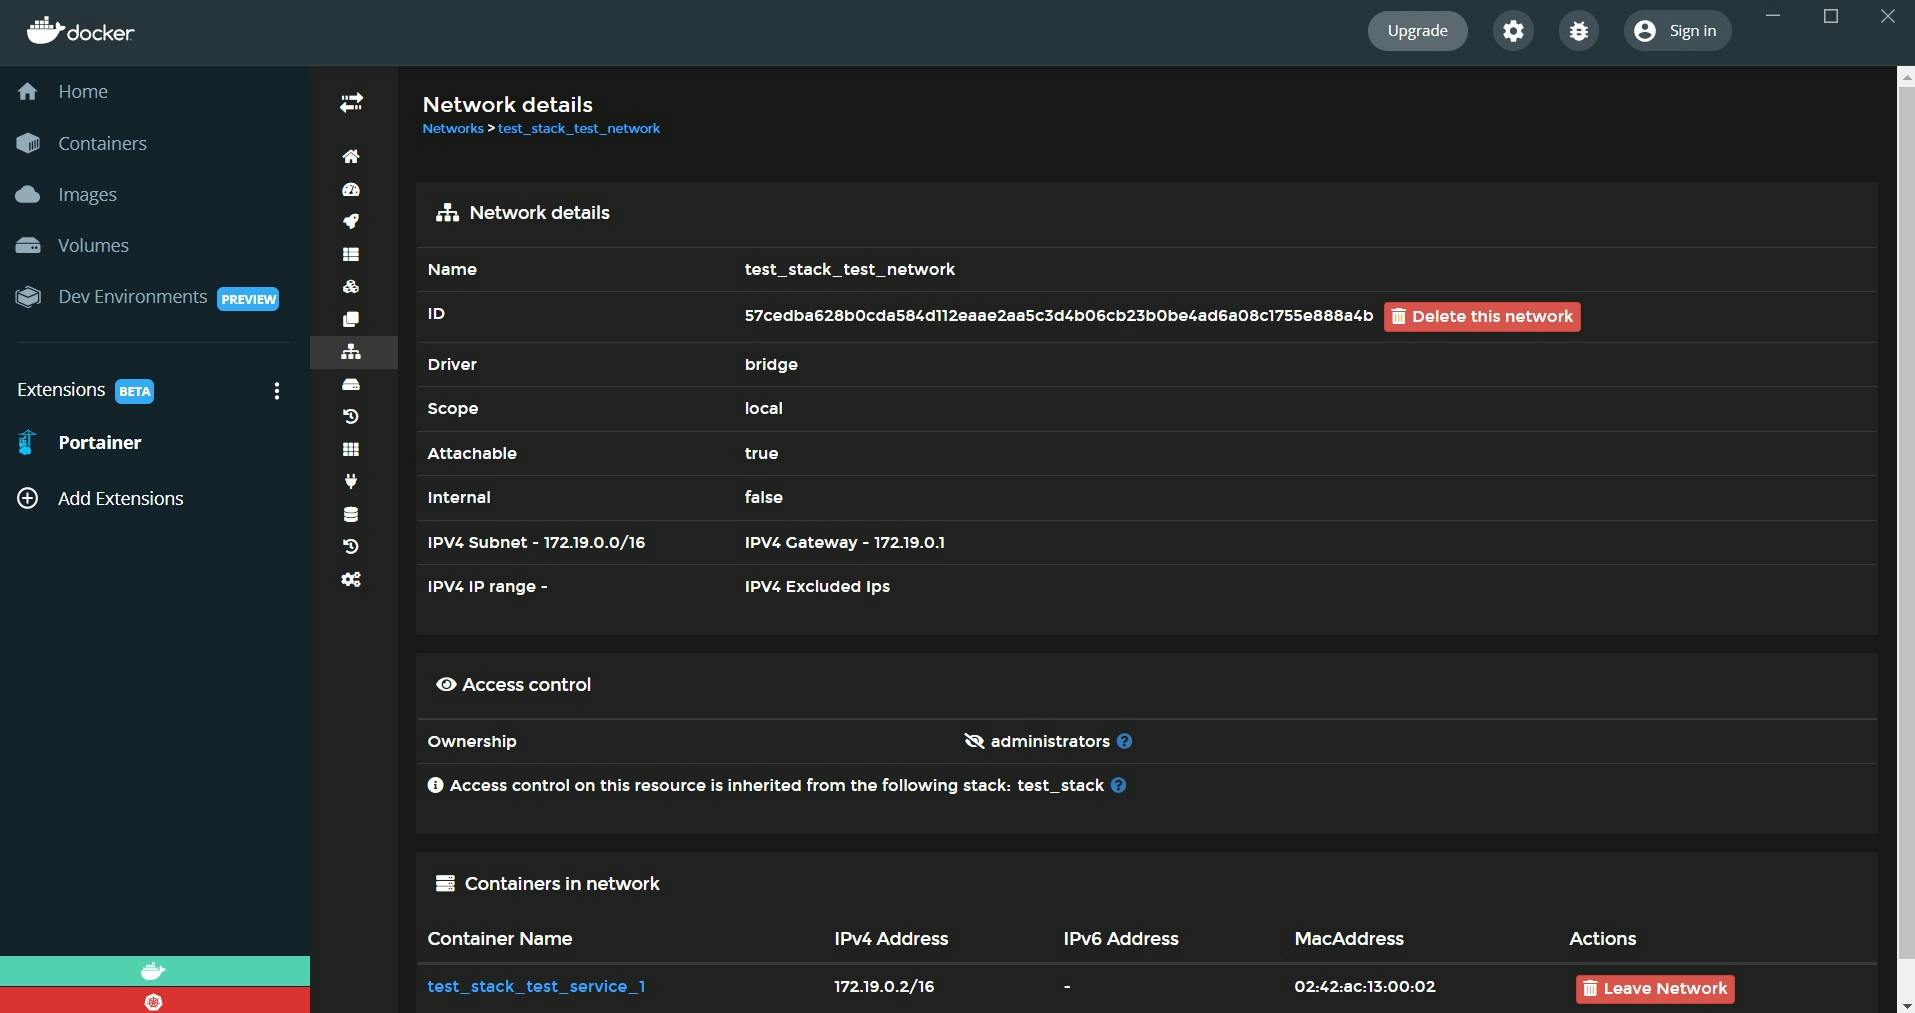
Clicking on either of these, we are taken to the details view of that resource.
You can also create volumes and networks manually through portainer along with all the other docker resources, so let's check this out.
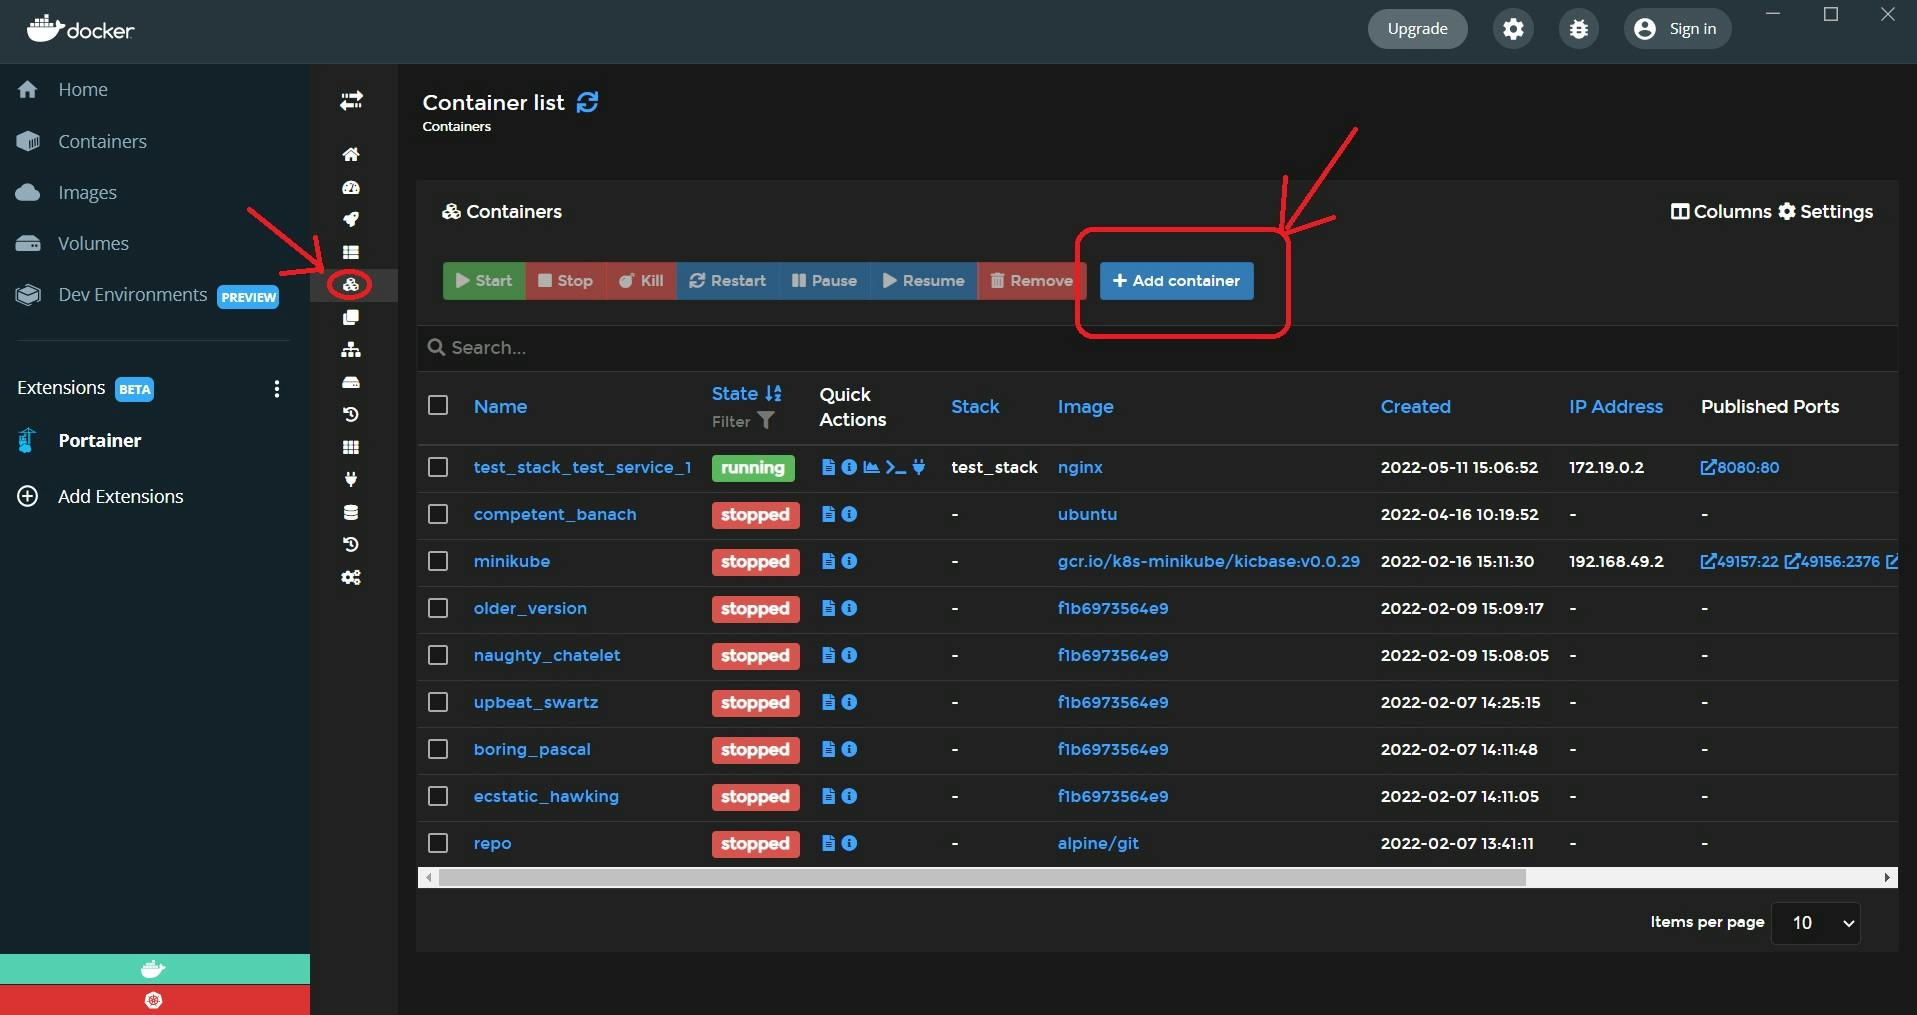
In the sidebar here, we have the containers view and through this we can see the containers in docker, and you have access to multiple actions on these including the add container view and through this you just deploy a downline container if you wanted to.
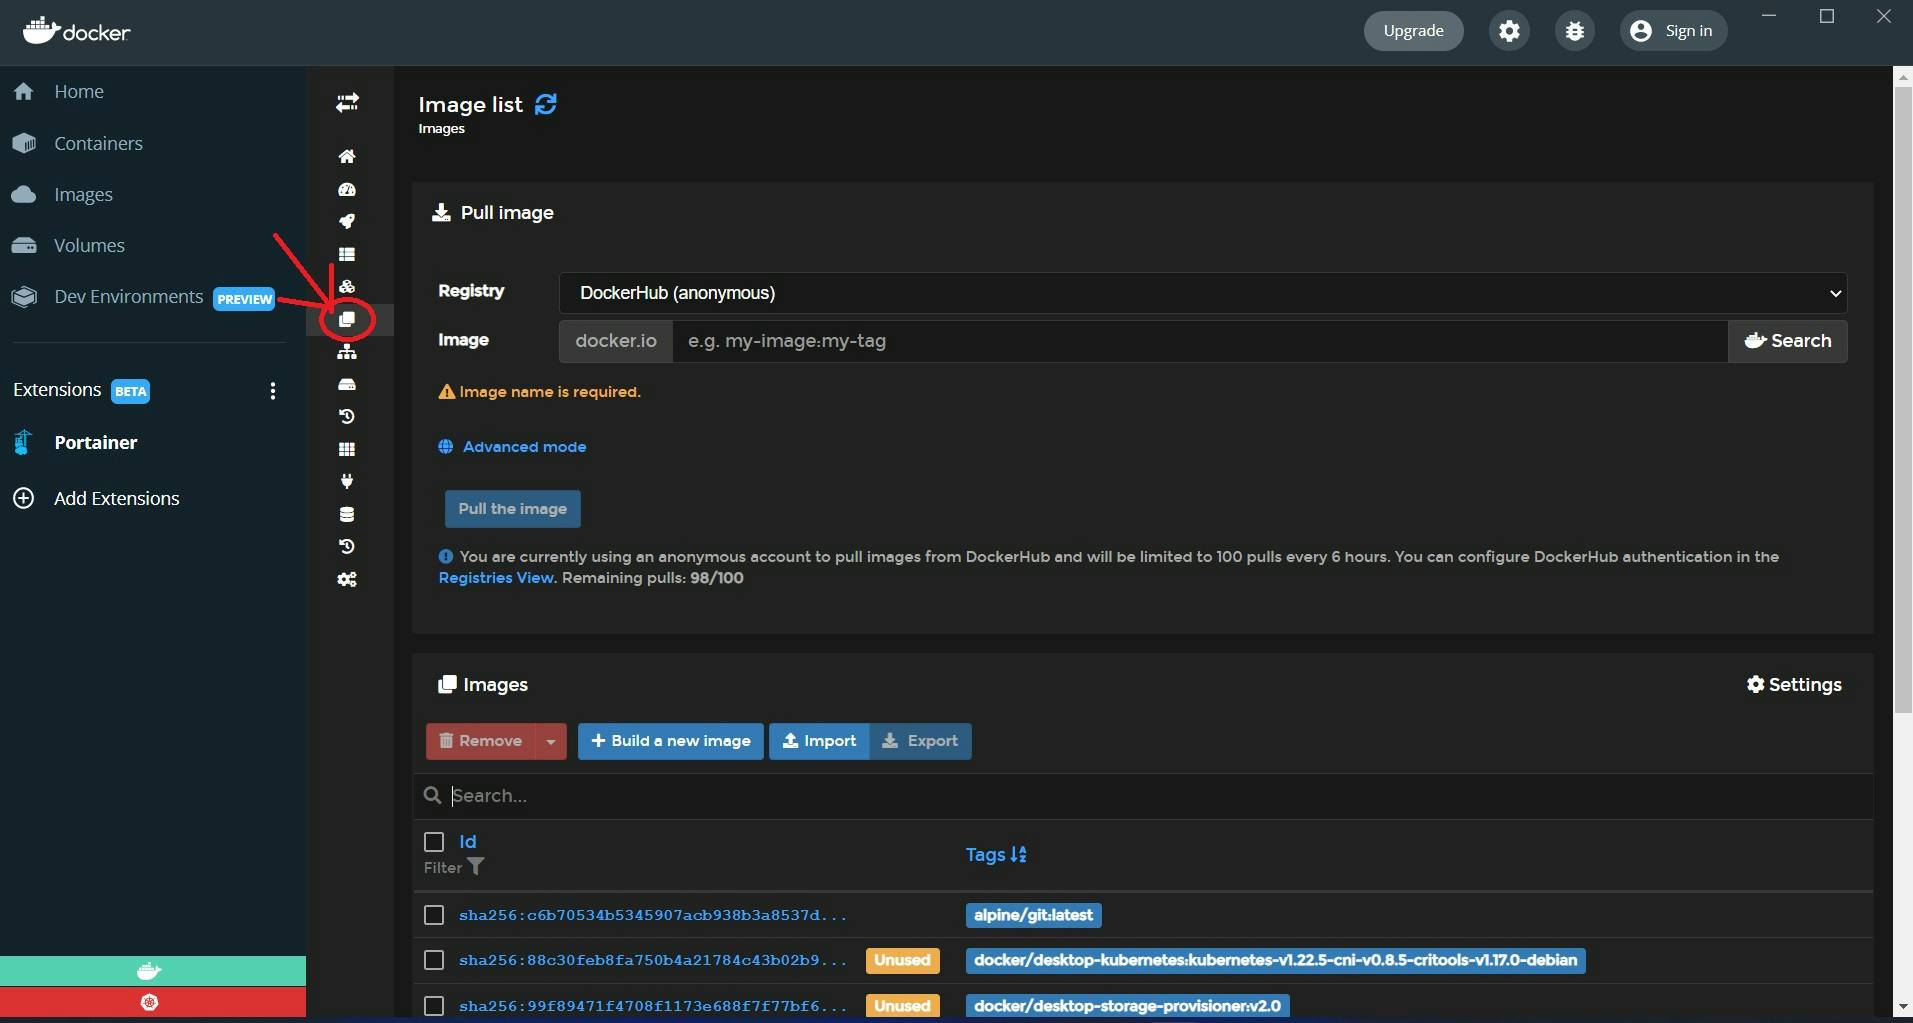
Next, we have images, which is a list of all the images in docker and will give the ability to build an image, and we can also import from a Dockerfile or pull from docker hub.
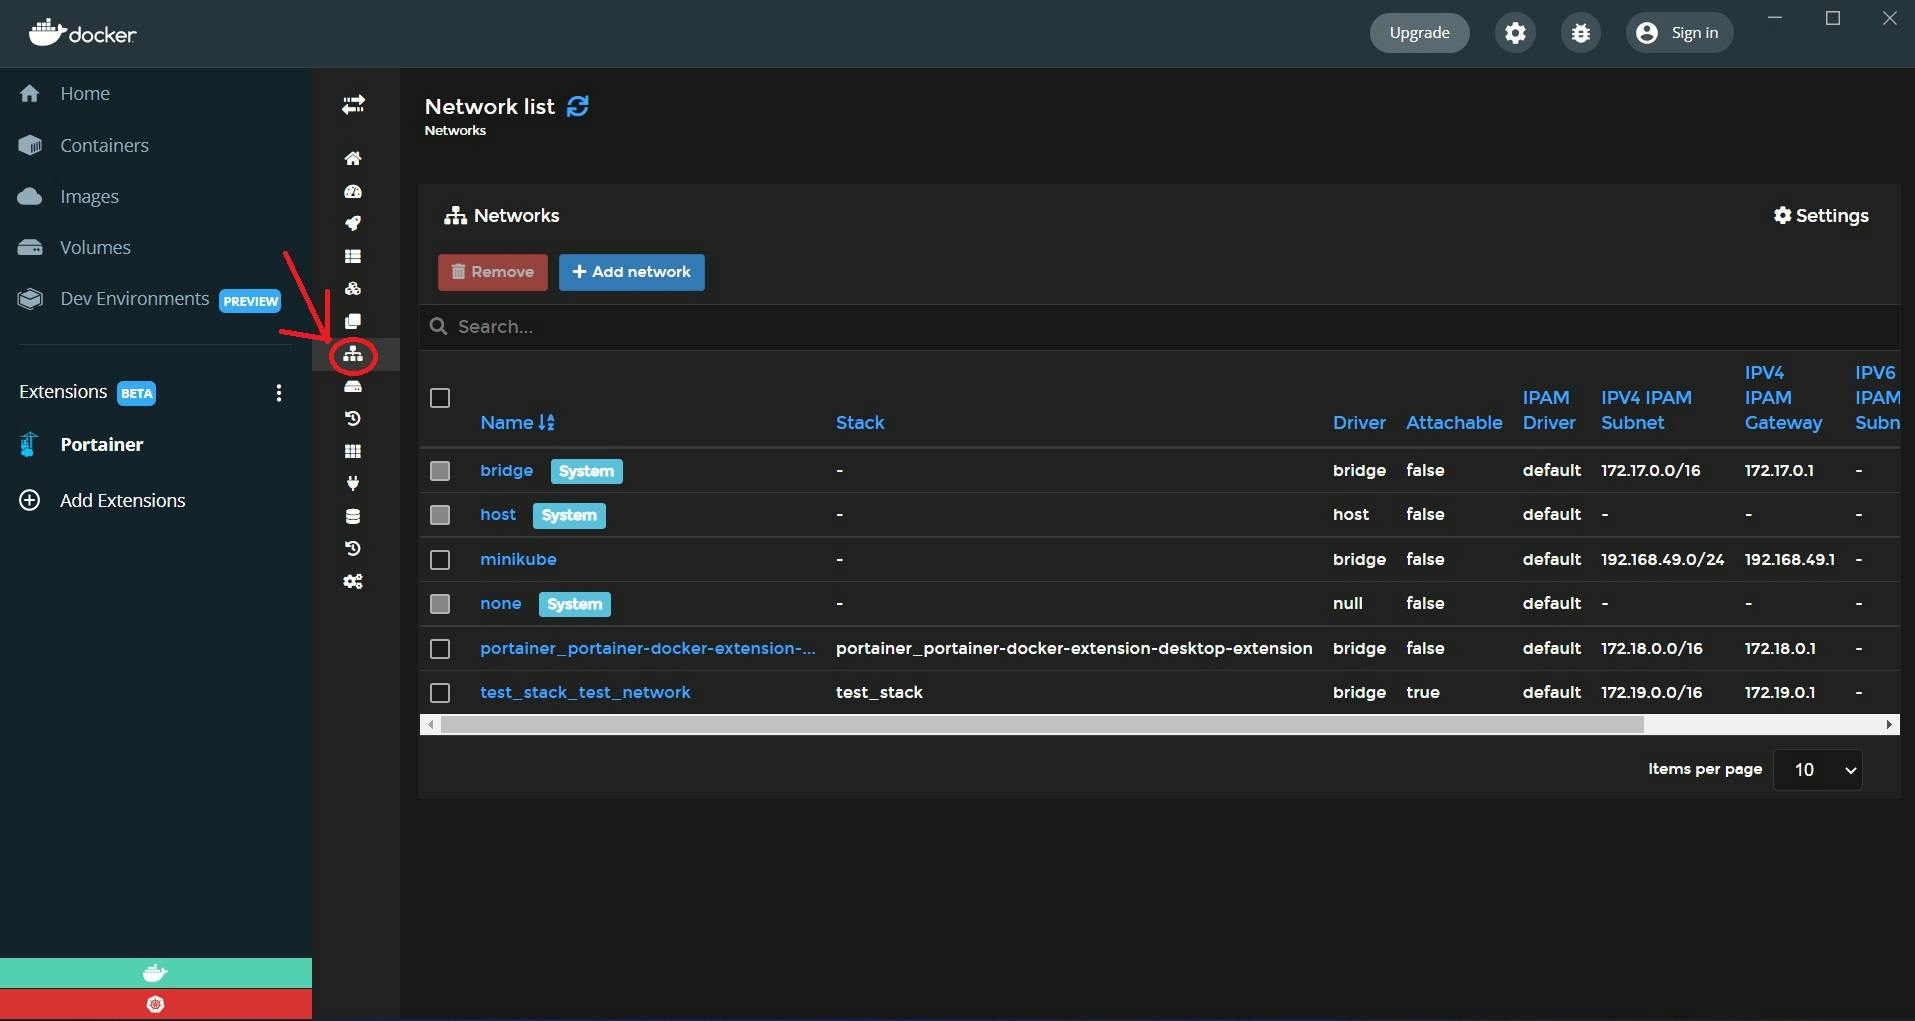
Next, is networks and as we can see below a list of system networks as well as my user generated network, and we have the ability here to add another network if I wanted.
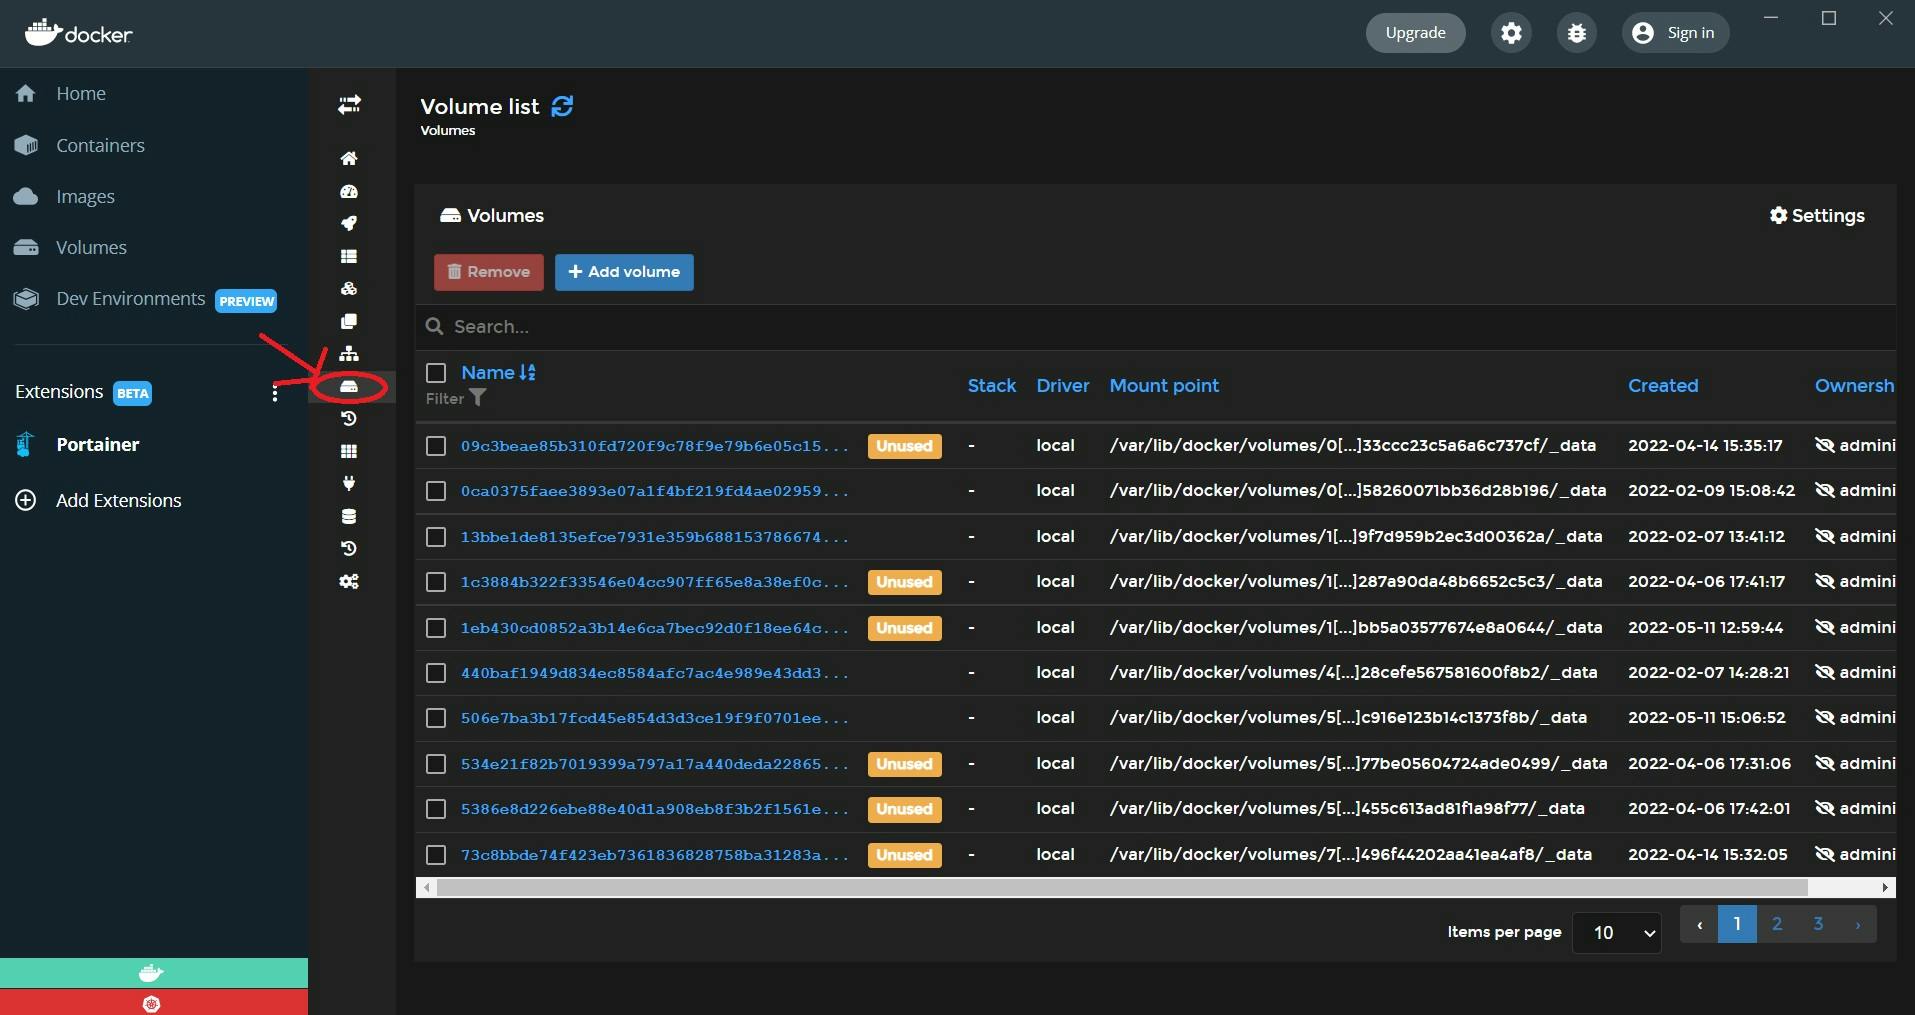
The same goes for volumes we can see all the volumes below, the status that they used or unused, and we have an Add volume view.
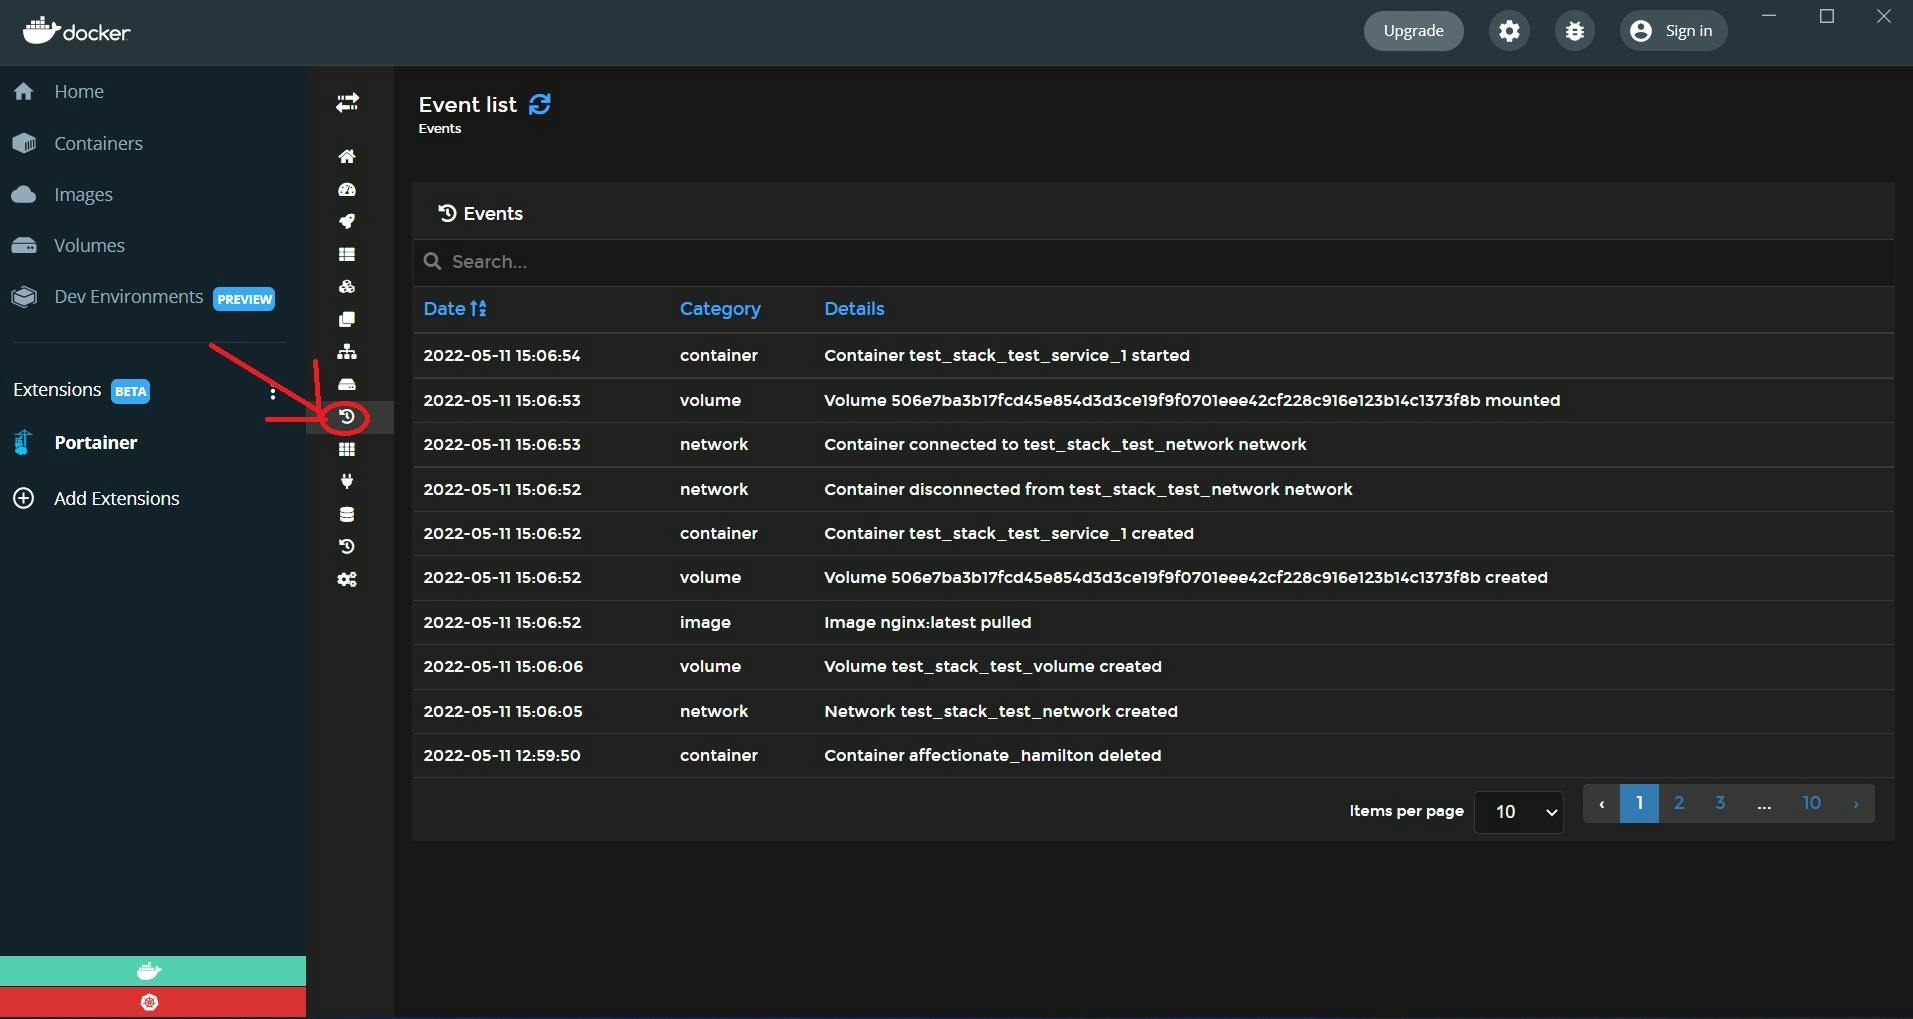
Next, is the Events generated by docker, It's pretty simple just a list of events.
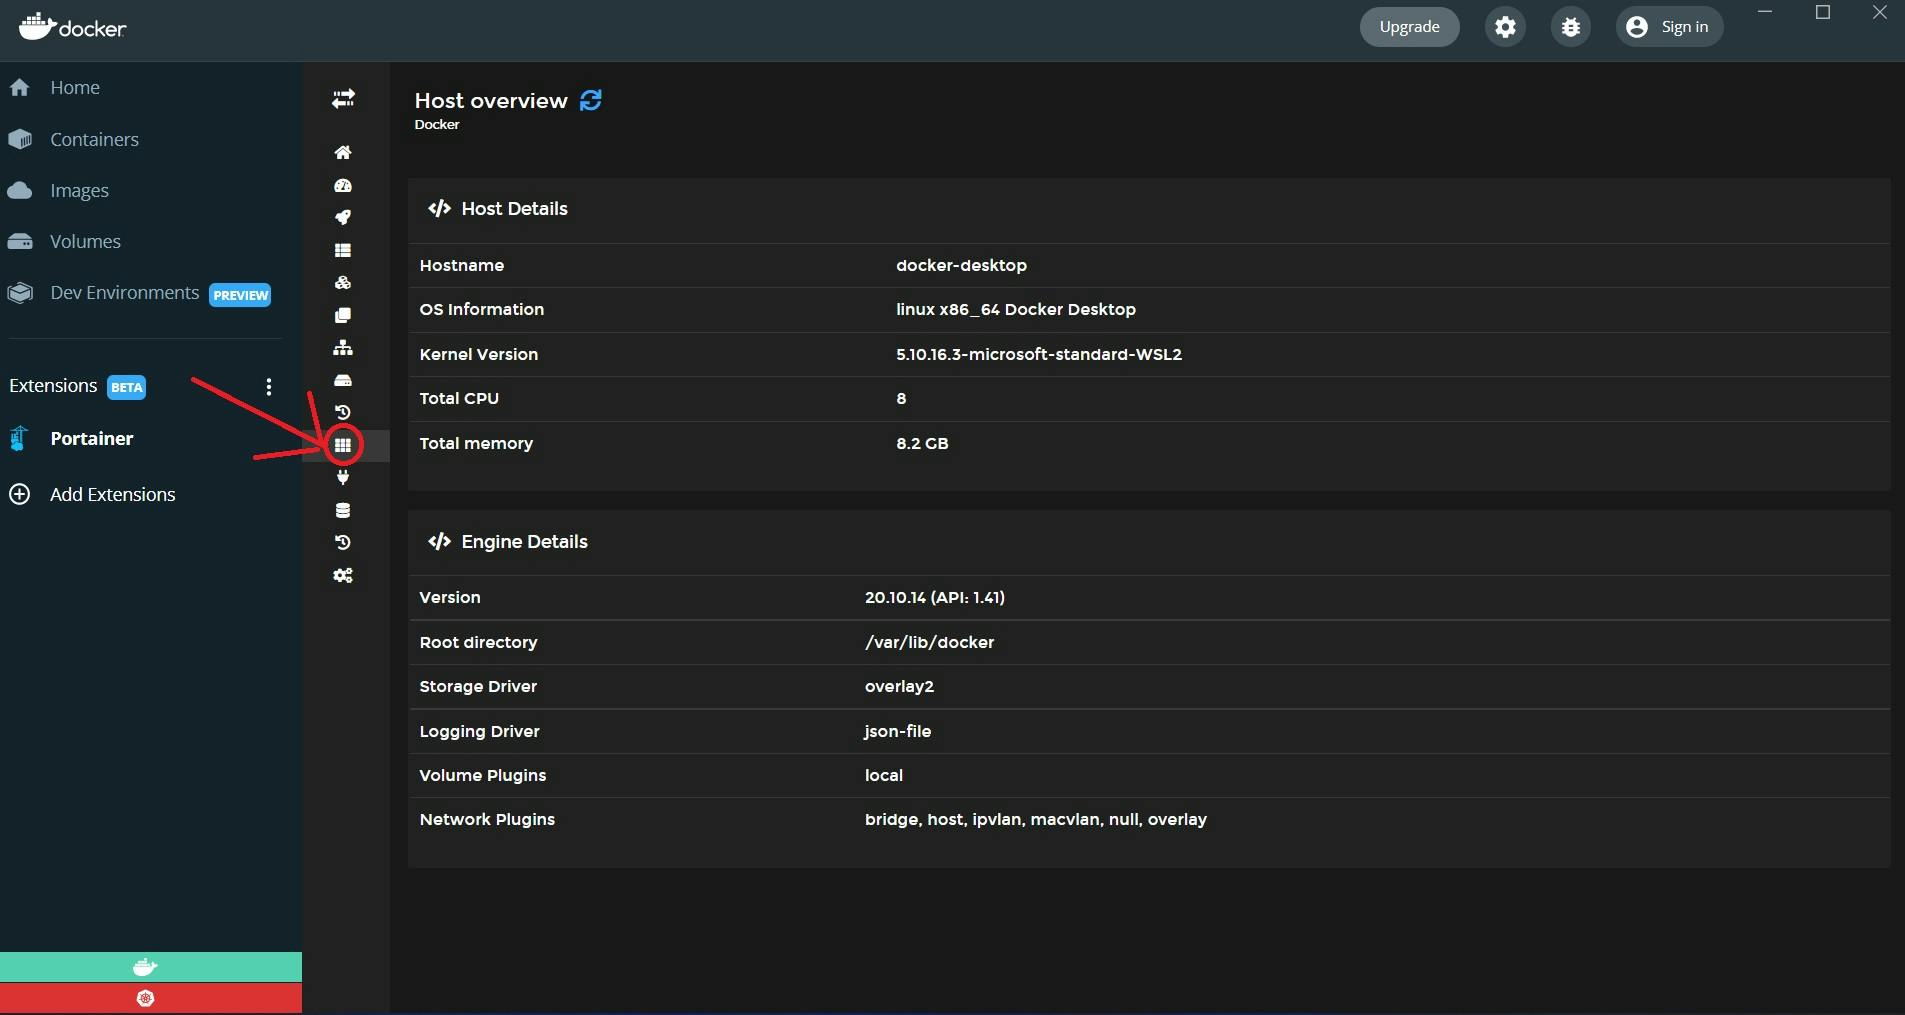
The host tells you about your host name and the resources available. Under here, we have Setup, which is a bunch of different settings.
Let's discuss a few of the convenience features that make portainer really shine.
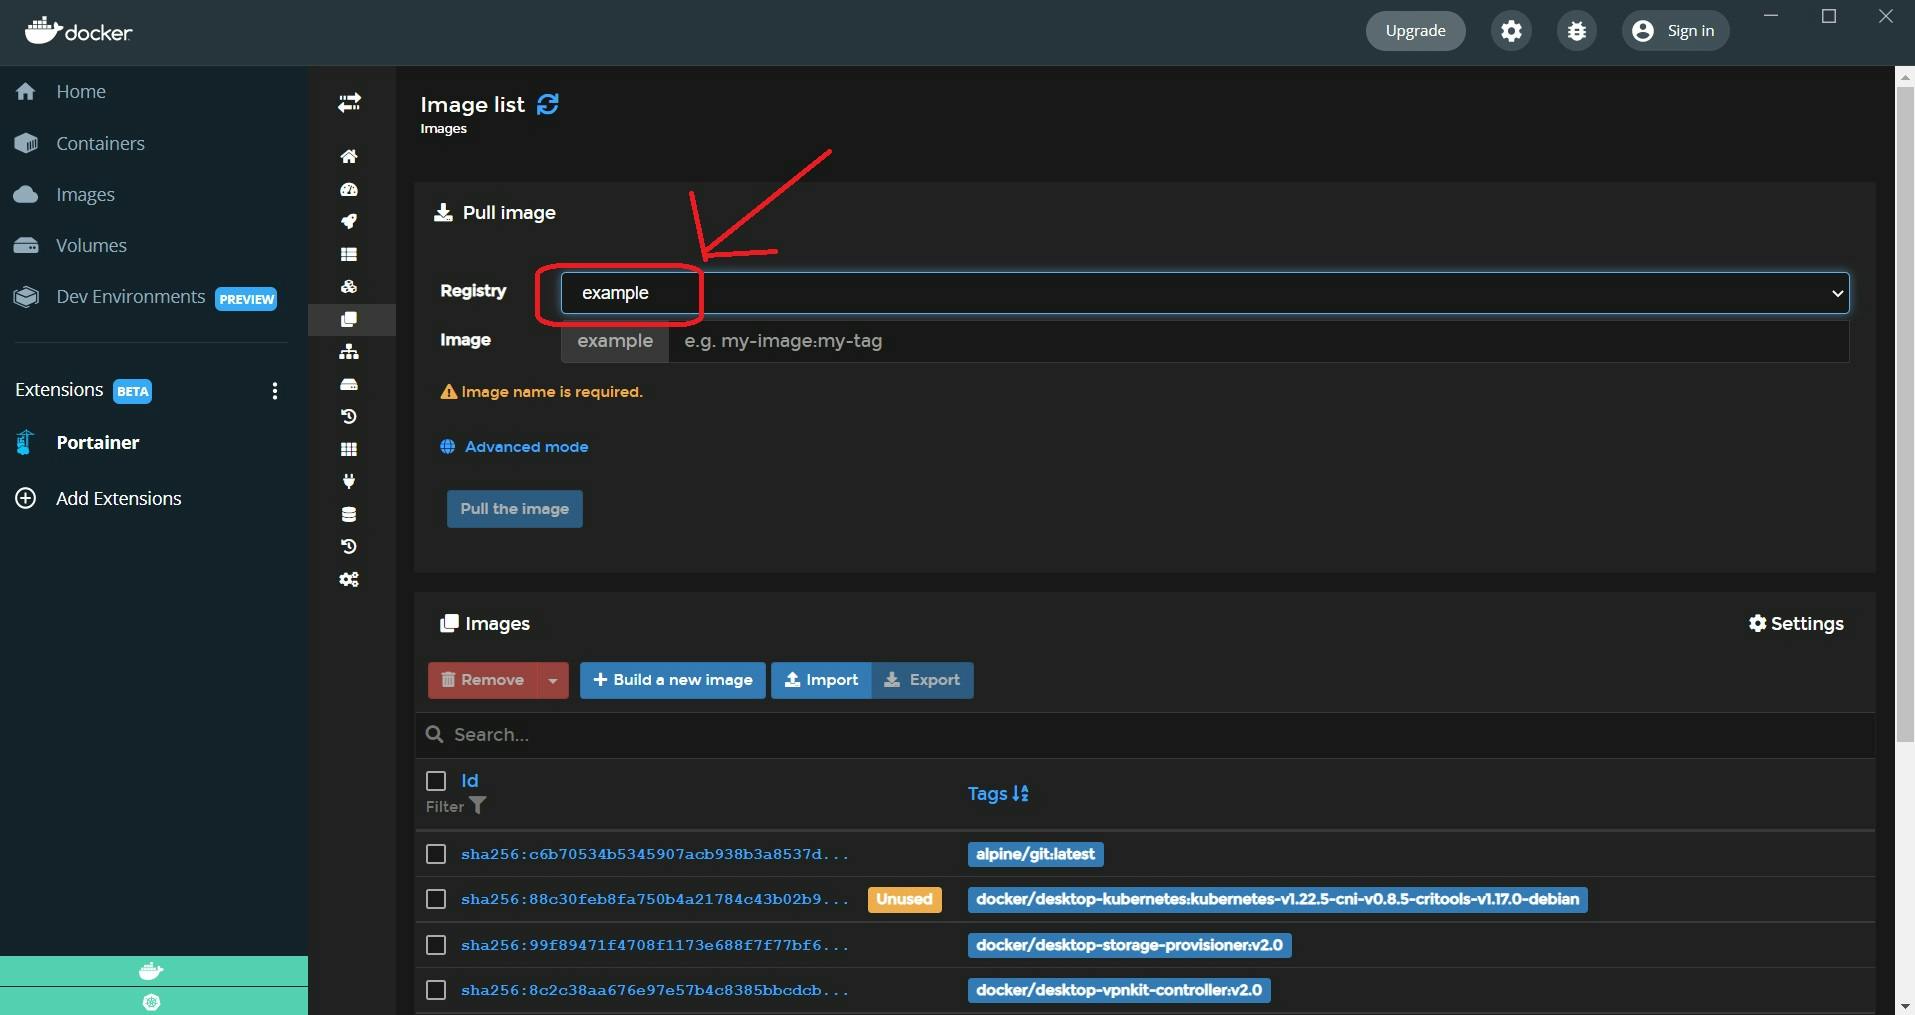
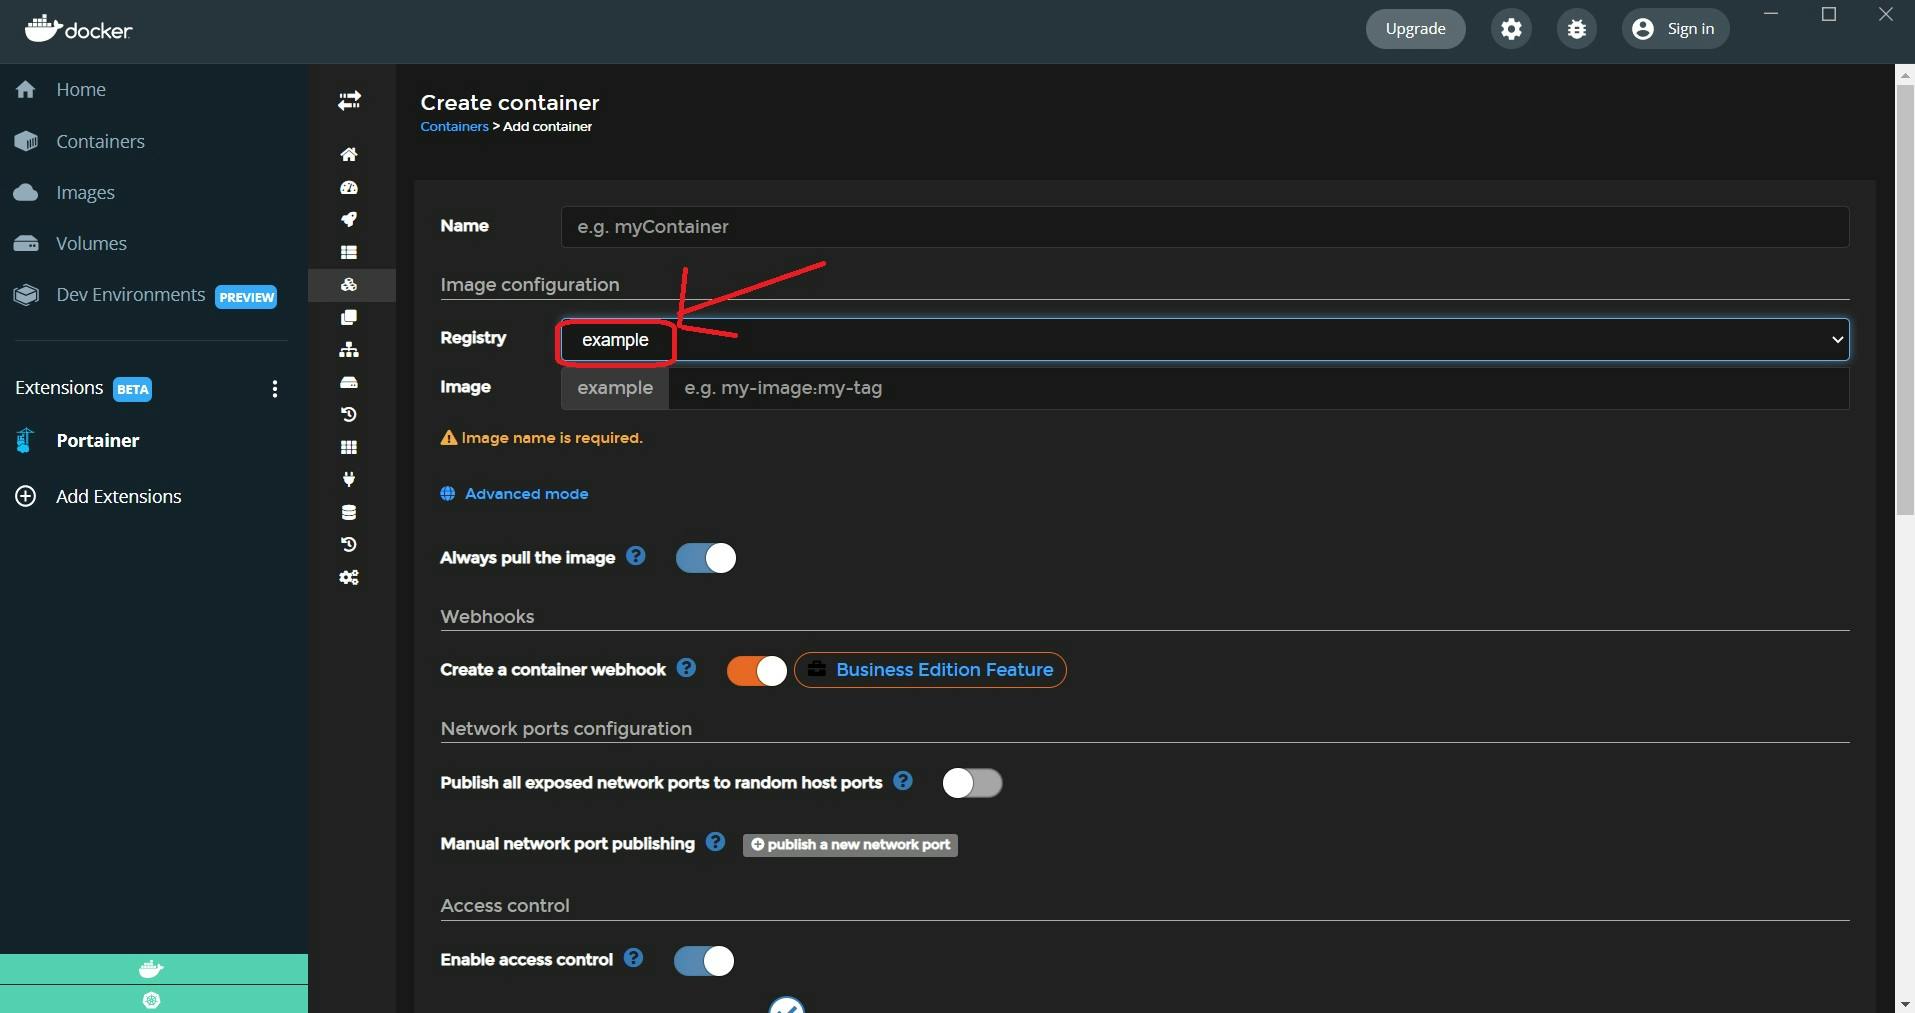
Let us head over to the registries view, this is where you can define credentials for multiple types of registries to use in the application.
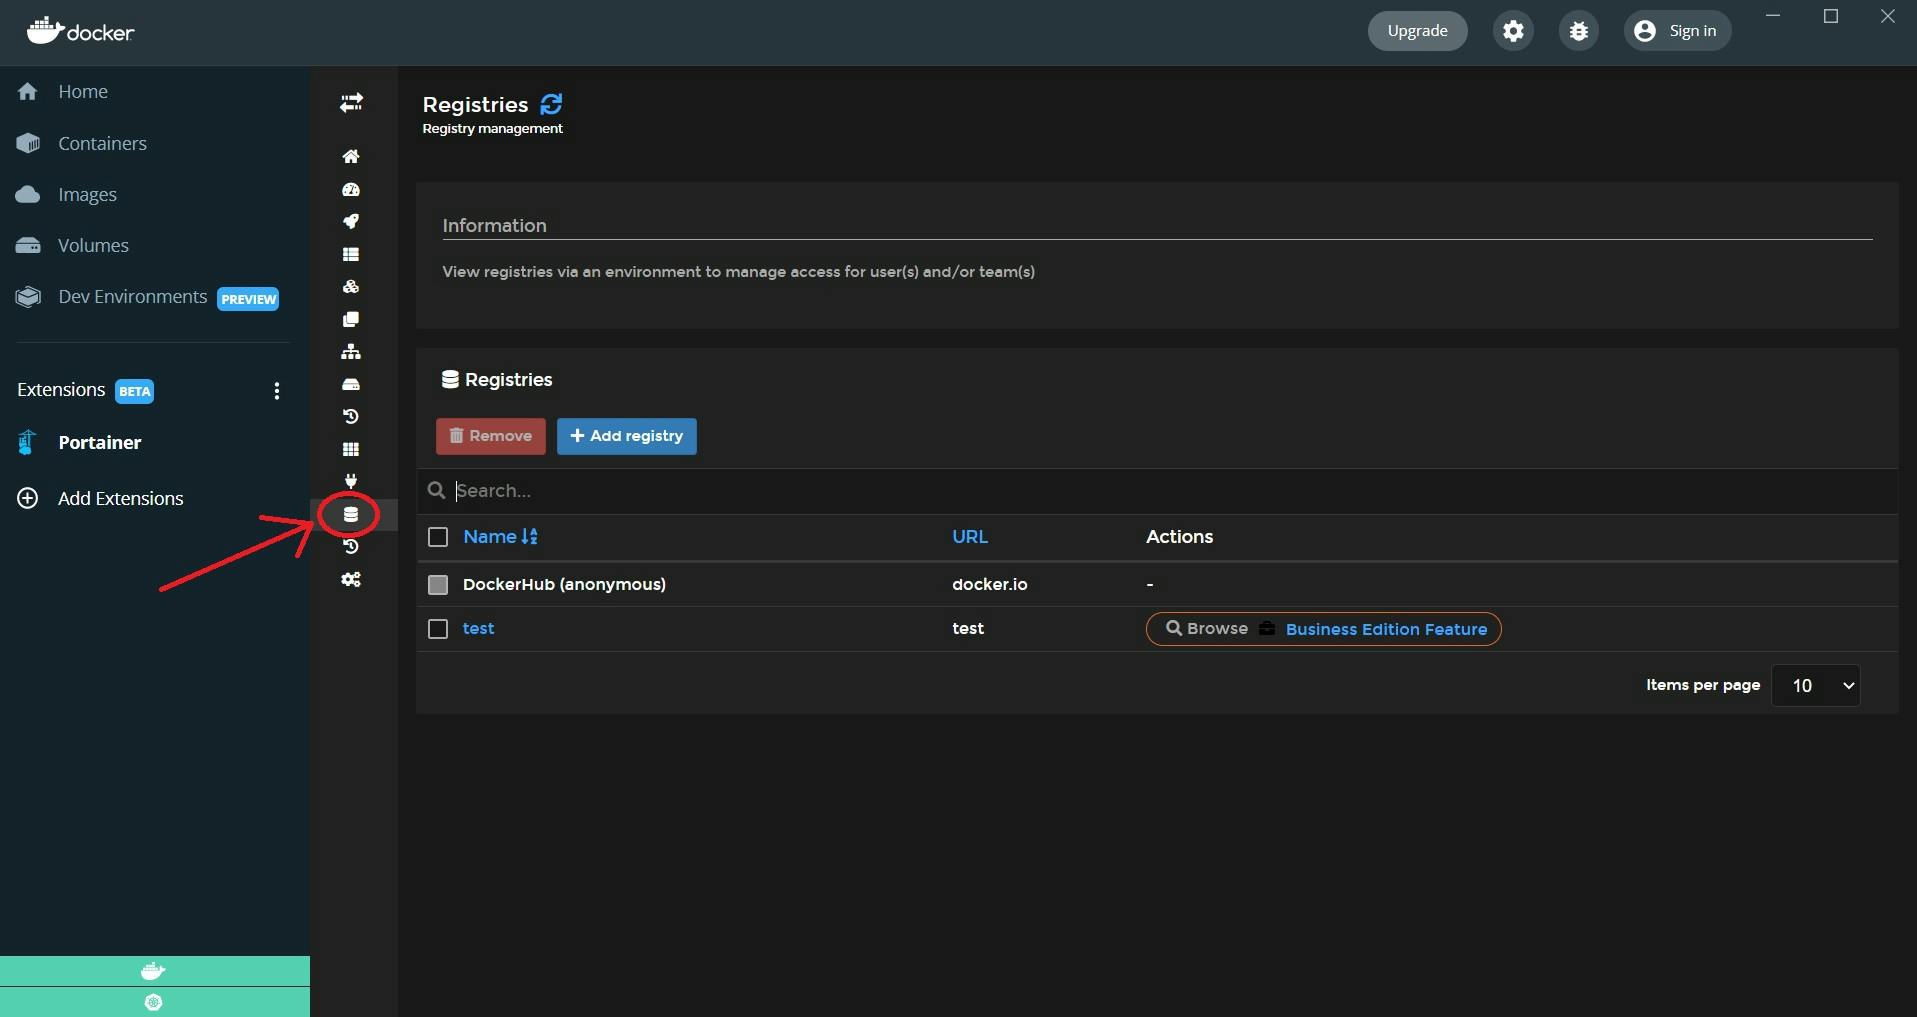
It supports different types of registries such as DockerHub, ECR, Quay, ProGet, Azure, Gitlab or any other custom registry type that supports the docker v2 registries API.
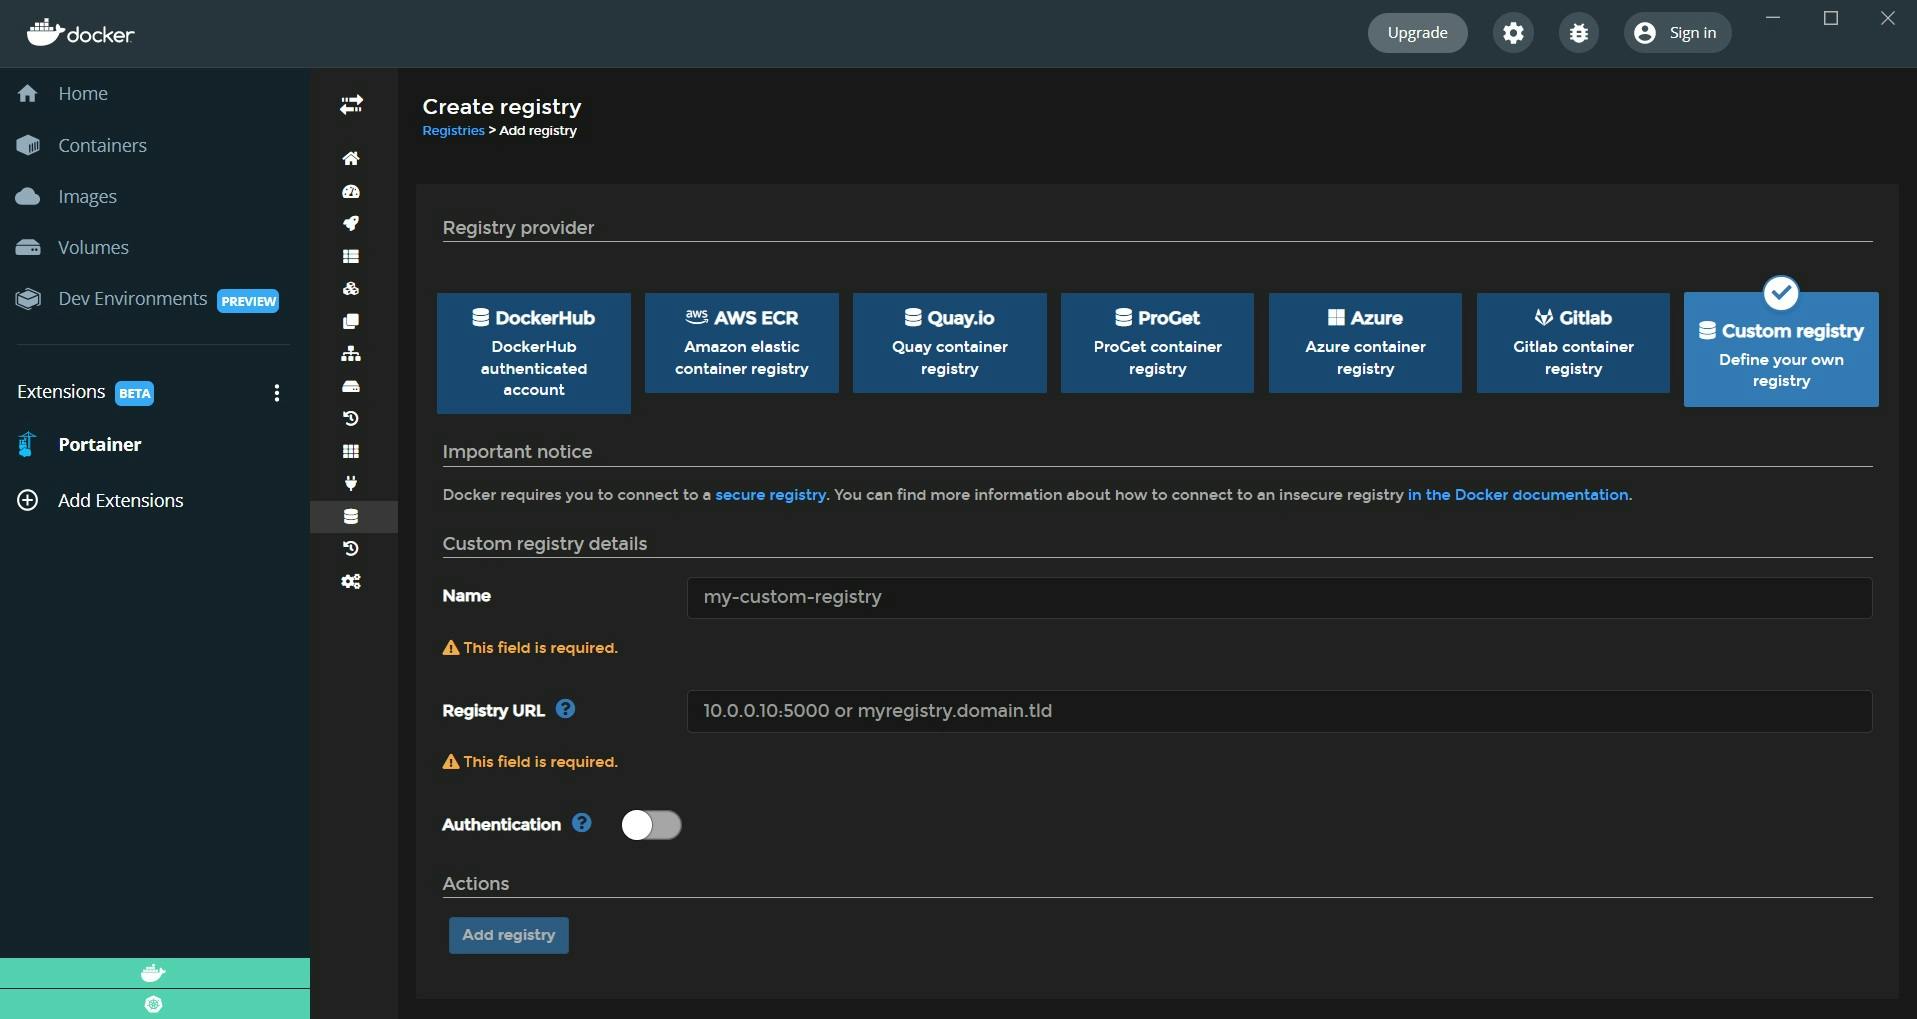
To illustrate how to use this feature I am going to add an example registry.
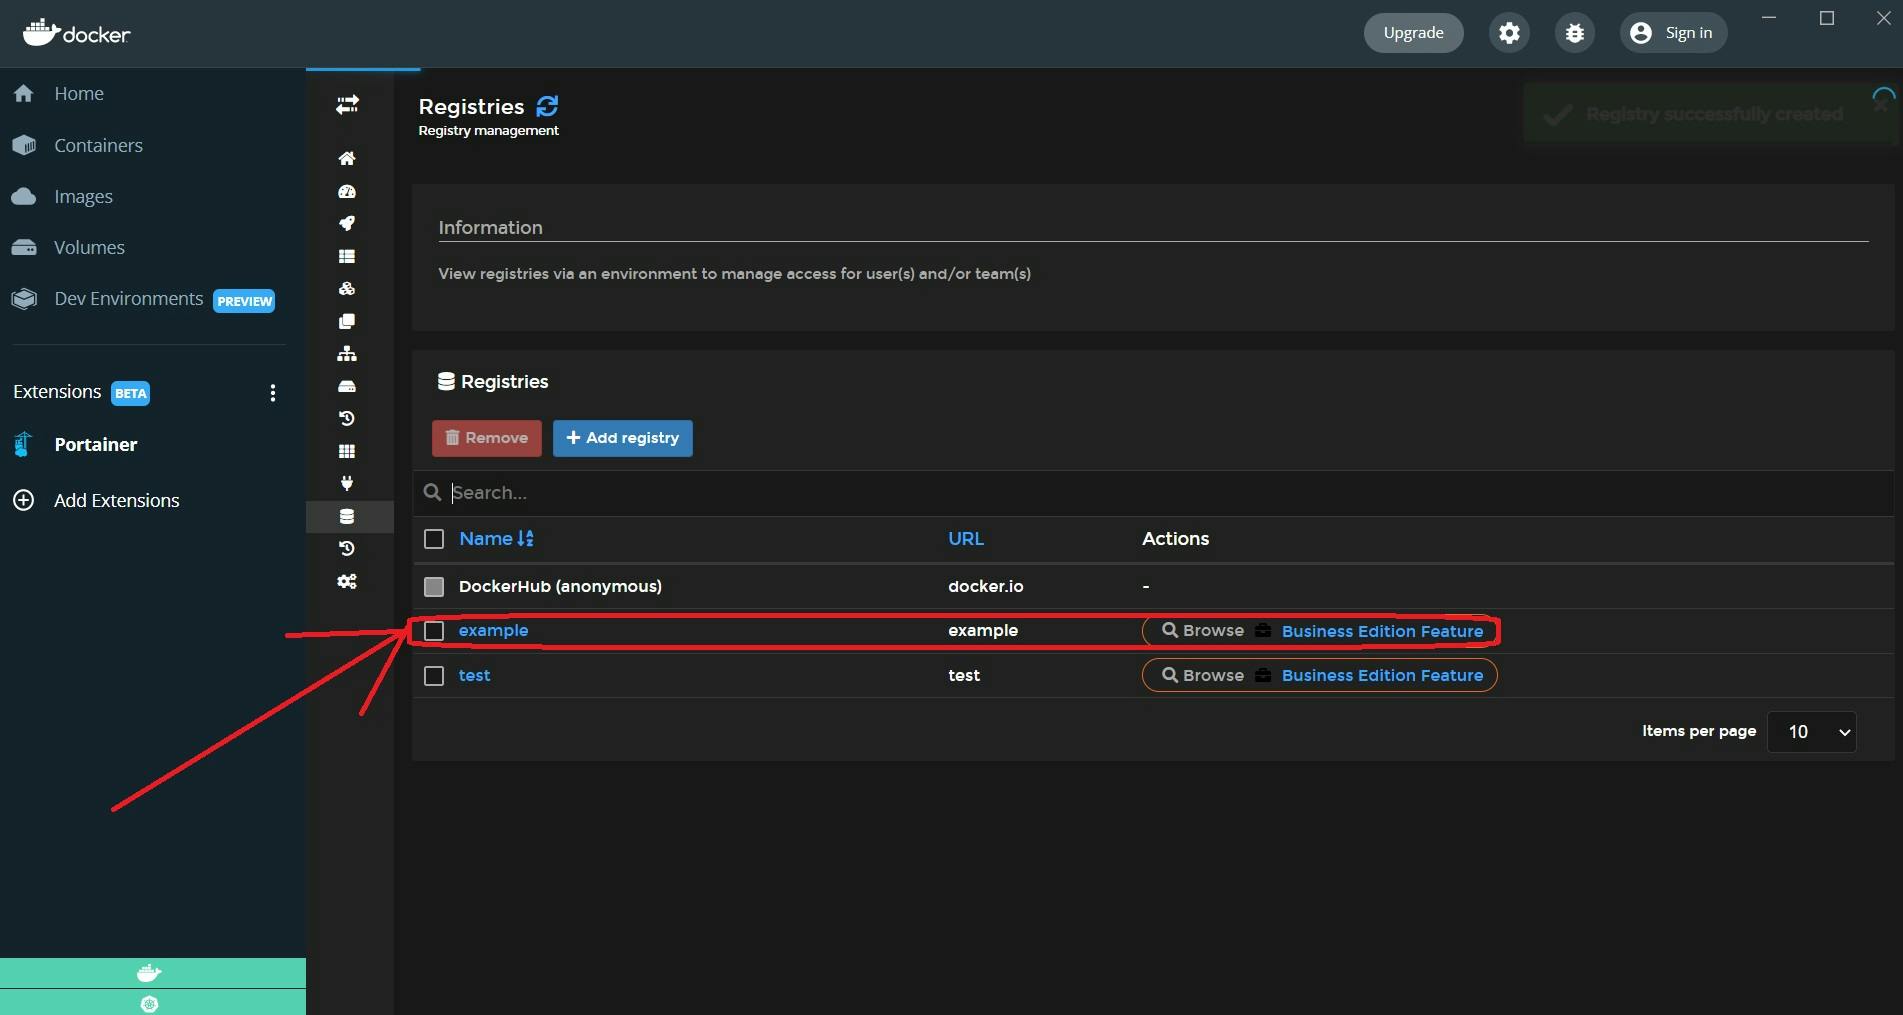
There's a few place in the application that you can make use of this registry just added.
- First, in the images view, you can choose to select that new registry and pull an image from it or you can push to it from inside an image.
- Another place that you can use your custom registry is through container deployment, you can choose the registry and then use an image from the registry to deploy.
- Last but not least, App Templates
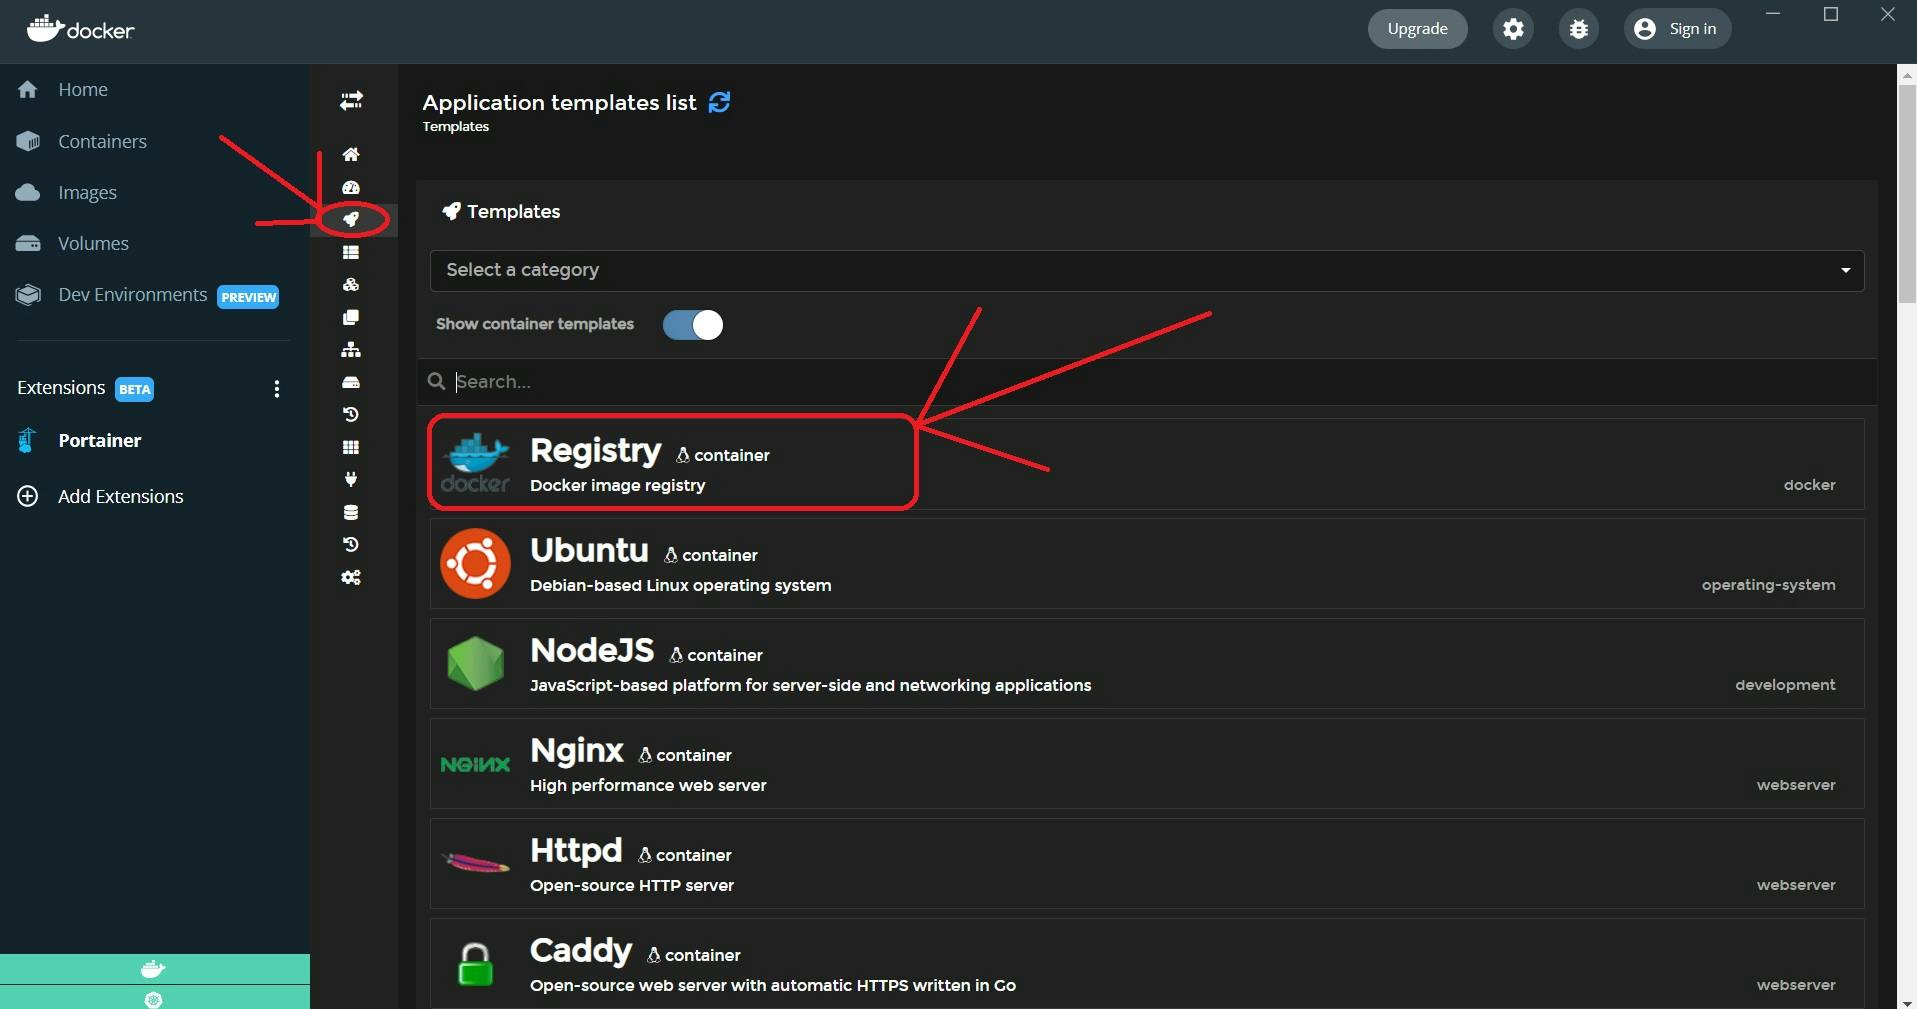
These are another awesome feature that works super well when running the portainer extension, it allow us to deploy containers without having to configure.
In custom template feature, we can create one from a compose file containing multiple containers such as front-end, back-end, and database and deploy all of that in seconds.
If you've reached so far thanks for reading, hopefully this blog has helped you get a better understanding of how to drive the portainer extension.